TUTORIAL SCRAPBOOK: MINI-ÀLBUM “ROSES”.
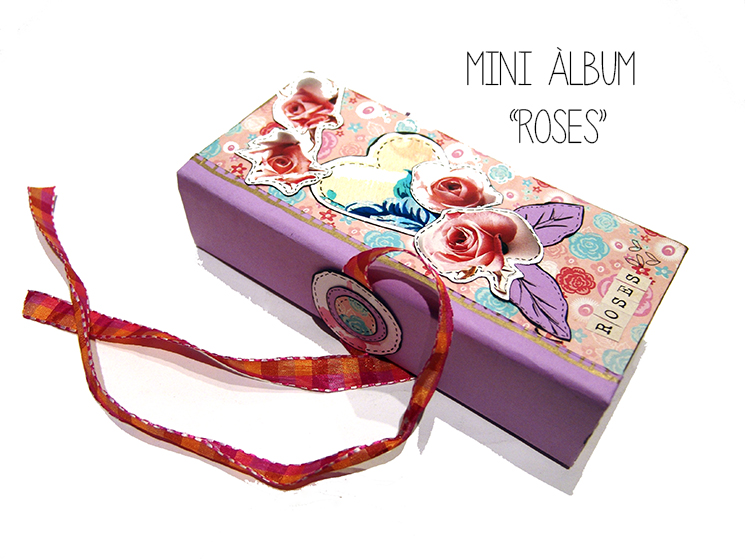
Les Antònies continuem jugant amb el paper i investigant les possibilitats de l’Scrapbook. La nostra última creació és el mini-àlbum que hem anomenat “Roses”.
En aquesta ocasió hem utilitzat un paper d’Scrapbook estampat per les dues cares, cartolina en color llis, cartró reciclat d’un paquet de cereals i retalls de fotocopies, impressions i revistes.
Començarem retallant en cartró dues peces de 8’5X19 cm i una peça de 4X19cm (1). Del paper d’Scrapbookestampat retallarem dues peces de 10X21 cm i de la cartolina llisa una peça de 6’5X21cm (2).
Escollim quina cara del paper estampat volem que es vegi per fora i, centrant-la enganxem la cartolina llisa (3) que serà el llom. Girem (4) i col·loquem el cartró per formar la tapa del mini-àlbum (5) centrant les parts, deixant un marge entre el llom i les tapes, per poder plegar i, finalment, les enganxem. Retallem les puntes del paper deixant un mm (6), pleguem i enganxem la part superior i la inferior (7), pleguem i enganxem els laterals (8) i, per tapar el cartró i les juntures, retallem una cartolina o un paper, una mica més petit que les tapes, i l’enganxem, el més centrat possible (9). Ja tenim les tapes acabades, només queda marcar els plecs del llom (10) i comprovem com queda tancat (11).
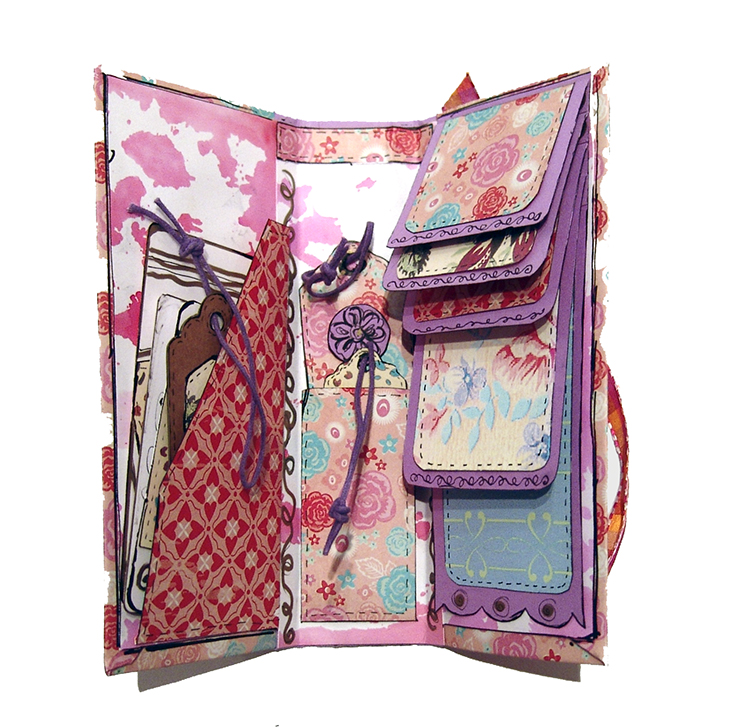
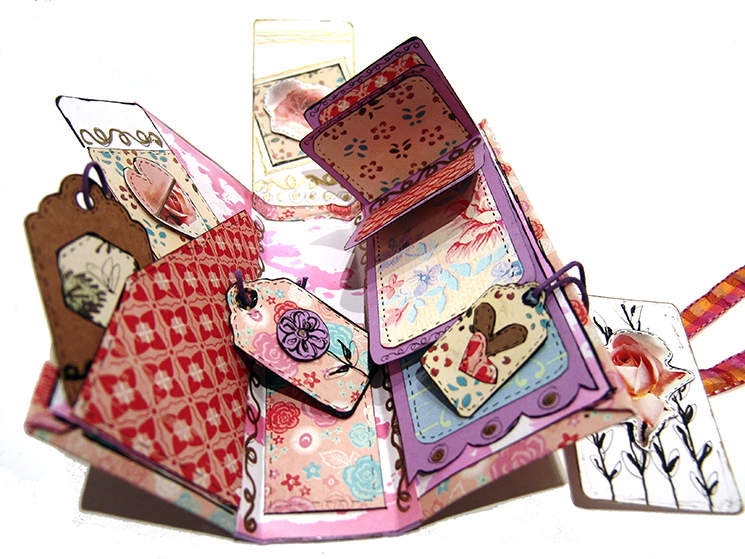
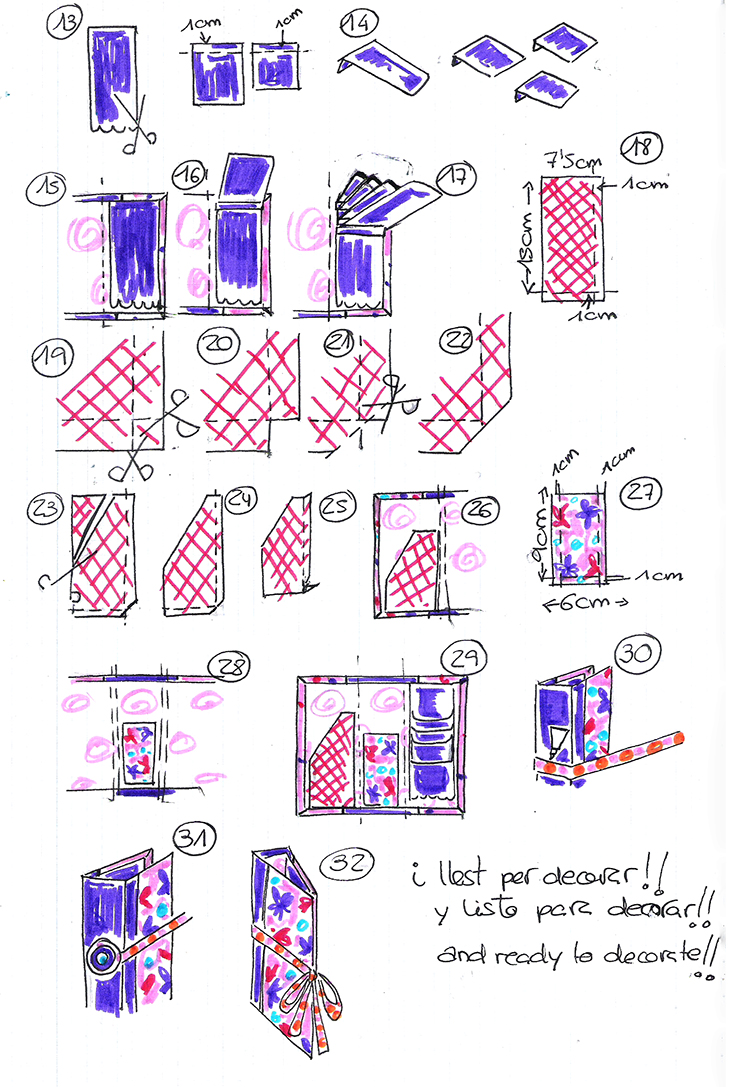
Comencem amb els complements interiors. A la part dreta del mini-àlbum hem fet una composició en cascada; necessitem, en cartolina llisa, una peça de 7X17’5cm, una peça de 7X11cm i tres peces de 7×6’5cm (12). A la peça més llarga farem una sanefa ornamental a la vora inferior i, a la resta de peces, a la vora superior,marcarem un plec d’1cm (13); pleguem (14) i enganxem la tira llarga a la tapa (15). Comencem a formar la cascada enganxat la primera de les peces més curtes a dalt de tot, per la pestanya (16) i anem afegint la resta, col·locant cada peça just arran, no damunt, de la pestanya de la peça anterior (17). A la part esquerra del mini-àlbumhem fet una butxaca amb obertura lateral. Hem fet servir una peça de paper estampat de 7’5X15cm i hem marcat plecs d’1cm a un costat i a la vora inferior (18); hem retallat el quadrat d’intersecció dels plecs (19) i ens ha de quedar com el dibuix (20); marquem una diagonal i retallem (21) obtenint les dues pestanyes (22). Com que no ho volem rectangular, marquem una diagonal (23) i retallem (24). Pleguem (25) i enganxem (26). Acabarem posant al centre una petita butxaca de paper estampat per la qual necessitem una peça de 6X9cm (27) on marcarem plecs d’1cm als costats i a la vora inferior. Repetirem les passes (19 a 22), plegarem i enganxarem (28). Ja tenim l’interior muntat (29).
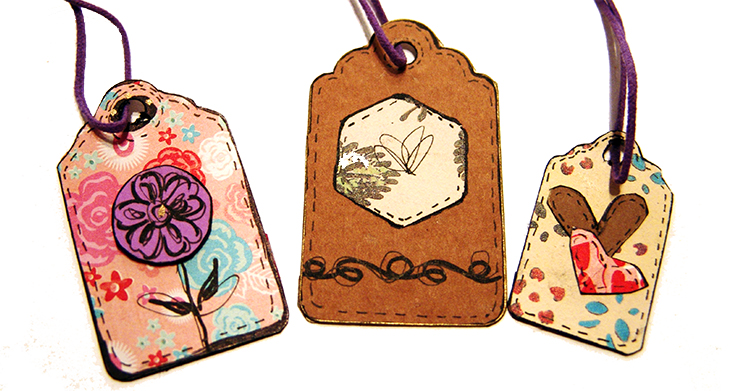
Per tancar el mini-àlbumfarem servir una cinta. Al centre del llom, amb cel·lo de doble cara o pega, enganxarem la cinta, només per un punt (30); farem un ornament, com vulguem, i el centrarem al llom, enganxant-lo per damunt de la cinta (31). Ja el podem tancar (32) i només queda decorar al nostre gust les tapes, els fulls en cascada i afegir etiquetes, targetes…tot el que ens agradi.
Esperem haver-vos inspirat a experimentar amb la tècnica de l’Scrapbook.
ROSES DE REVISTA PER DONAR UN TOC DE PRIMAVERA!!!
TUTORIAL SCRAPBOOK: MINI-ÁLBUM “ROSES”.
Les Antònies continuamos jugando con el papel e investigando las posibilidades del Scrapbook. Nuestra última creación es el mini-álbum que hemos nombrado “Roses”.
En esta ocasión hemos usado un papel de Scrapbookestampado por las dos caras, cartulina en color liso, cartón reciclado de un paquete de cereales y recortes de fotocopias, impresiones y revistas.
Empezaremos recortando en cartón dos piezas de 8’5X19cm y una pieza de 4X19cm (1). Del papel de Scrapbook estampado recortaremos dos piezas de 10X21cm y de la cartulina lisa una pieza de 6’5X21cm (2).
Escogemos que cara del papel estampado queremos que se vea por fuera y, centrándola, pegamos la cartulina lisa (3) que será el lomo. Giramos (4) y colocamos el cartón para formar la tapa del mini-álbum (5) centrando las partes, dejando un margen entre el lomo y las tapas, para poder plegar y, finalmente, las pegaremos. Recortamos las puntas del papel dejando un mm (6), plegamos y pegamos la parte superior y la inferior (7), plegamos y pegamos los laterales (8) y, para tapar el cartón y las junturas, recortamos una cartulina o un papel, un poco más pequeño que les tapas, y lo pegamos, lo más centrado posible (9). Ya tenemos las tapas acabadas, solo queda marcar los pliegues del lomo (10) y comprobamos como queda cerrado (11).
Comenzamos con los complementos interiores. En la parte derecha del mini-àlbum hemos hecho una composición en cascada; necesitamos, en cartulina lisa, una pieza de 7X17’5cm, una pieza de 7X11cm y tres piezas de 7×6’5cm (12). En la pieza más larga haremos una cenefa ornamental en la orilla inferior y, en el resto de piezas, en la parte superior, marcaremos un pliegue de 1cm (13); plegamos (14) y pegamos la tira larga a la tapa (15). Empezamos a formar la cascada pegando la primera de las piezas más cortas arriba de todo, por la pestaña (16) y vamos añadiendo el resto, colocando cada pieza justo a ran, no sobre, de la pestaña de la pieza anterior (17). En la parte izquierda del mini-álbum hemos hecho un bolsillo con apertura lateral. Hemos usado una pieza de papel estampado de 7’5X15cm y hemos marcado pliegues de 1cm a un lado y en la parte inferior (18); hemos recortado el cuadrado de intersección de los pliegues (19) y nos ha de quedar como el dibujo (20); marcamos una diagonal y recortamos (21) obteniendo las dos pestañas (22). Como que no lo queremos rectangular, marcamos una diagonal (23) y recortamos (24). Plegamos (25) y pegamos (26). Acabaremos poniendo en el centro un pequeño bolsillo de papel estampado para la cual necesitamos una pieza de 6X9cm (27) donde marcaremos pliegues de 1cm a los lados y en la parte inferior. Repetiremos los pasos (19 a 22), plegaremos y pegaremos (28). Ya tenemos el interior montado (29).
Para cerrar el mini-álbum usaremos una cinta. En el centro del lomo, con celo de doble cara o pega, pegaremos la cinta, solo por un punto (30); haremos un ornamento, como queramos, y lo centraremos al lomo, pegándolo sobre la cinta (31). Ya lo podemos cerrar (32) y solo queda decorar a nuestro gusto las tapas, las páginas en cascaday añadir etiquetas, tarjetas…todo lo que nos guste.
Esperamos haberos inspirado a experimentar con la técnica del Scrapbook.
¡¡¡ROSAS DE REVISTA PARA DAR UN TOQUE DE PRIMAVERA!!!
SCRAPBOOK TUTORIAL: MINI-ALBUM «ROSES».
Les Antònies continue playing with the paper and investigating the possibilities of the Scrapbook. Our latest creation is the mini-album that we have called «Roses».
On this occasion we have used a printed Scrapbookpaper in both sides, smooth colour cardstock, recycled cardboard from a cereal package and cut-outs of photocopies, prints and magazines.
We will start by cutting out in cardboard two pieces of 8″5X19cm and a piece of 4X19cm (1). Printed Scrapbookpaper cut two pieces of 10X21cm and smooth cardboard one-piece 6″5X21cm (2).
We choose that sided patterned paper we want to be seen outside, and cantering it, paste the smooth cardboard (3) which will be the spine. We turn (4) and put the carton to form the lid of the mini-album(5) focusing the parties, leaving a margin between the spine and covers, to be able to fold and, finally, paste them. Cut the ends of the paper leaving a mm (6), sit and paste the top and the bottom (7), sit and stick the sides (8) and, to cover the cardboard and the joints, cut a cardboard or paper, a little smaller that covers them, and stick it, more focused (9). We have finished tops, just mark the folds of the loin (10) and check how closed is (11).
Let»s start with the interior accessories. On the right side of the mini-album we made a composition in cascade; we need, in smooth cardboard, a piece of 7X17″5cm, a piece of 7X11cm and three pieces of 7X6″5cm (12). The longest piece will be an ornamental border on the bottom edge, and the rest of the pieces, to the top edge, mark a fold of scraped (13); let»s fold it (14) and attach the long strip on the cover (15). We begin to form the cascadestuck the first of the shorter pieces at the top of the tab (16) and we»ll add the rest, placing each piece just following, not above, the tab of the above piece (17). On the left side of the mini-albumwe made a pocket with side opening. We used a piece of printed paper of 7″5X15cm and we have marked folds of indent on one side and lower edge (18); we have cut out the square intersection of folds (19) and we should be as a drawing (20); mark a diagonal cut (21) obtaining the two tabs (22). As we do not want it rectangular, cut and mark a diagonal (23) (24). We fold (25) and paste (26). We will finish putting in the centre a small pocket of stamped paper for which we need a piece of 6X9cm (27) where we will mark 1cm at the sides and at the bottom folds. Repeat the steps (19 to 22), we fold it and paste (28). We already have mounted the inside (29).
To close the mini-album we will be using a ribbon. In the centre of the loin, with methods of double-sided or glue, fix the ribbon, only to a point (30); make an ornament, as we want, and will focus on the spine, sticking it on top of the ribbon (31). We can close (32) and it remains only to decorate to our taste the covers, the cascading pages and add tags, cards … everything what we like.
We hope to have you inspired to experiment with the technique of the Scrapbook.
MAGAZINE’S ROSES TO GIVE A TOUCH OF SPRING!!!


