TUTORIAL PATCHWORK: TAPET DE NADAL VERSIÓ LES ANTÒNIES.
Aquest tapet o tapis, depèn de l’ús que li donem, és molt senzill de fer i és la nostra particular visió del Nadal. Ja sabeu que no som gaire ortodoxes i, al final, sempre fem un gir i ens desviem del camí, per fer-lo més fàcil o per complicar-nos la vida. En fi, Les Antònies tenim esperit aventurer.
Comencem el tutorial. Necessitem 6 retalls de teles diferents de 20cmX20cm (1). Els disposem de dos en dos i els encarem (2). La novetat d’aquest tutorial és que us ensenyarem a treure 8 quadrats amb triangle de cada parella. Per fer això, dibuixem una creu aspada de cantonada a cantonada. Cosim dues costures per fora de cada línia com veieu al dibuix (3). El truc està en com tallem. Pel centre de la línia que hem dibuixat, deixant una costura a cada banda, i per la meitat del quadre en horitzontal i vertical (4). Obtenim 8 triangles (5) i, oberts, ens queden els 8 quadrats amb triangle. Al final ens han de sortir 3 jocs de 8 quadrats cada un (6).
Distribuïm com veieu a l’esquema: 2 tires laterals i 4 mini-blocs(7). Cosirem i unirem el conjunt com sempre hem fet: de mini-bloc en mini-bloc; les tires laterals; els 4 mini-blocs i, al final, les tires a cada costat.
Per fer el tapet, necessitem: el patchwork, folre de la mateixa mesura que el patchwork i buata una mica més gran per treballar amb comoditat (8).
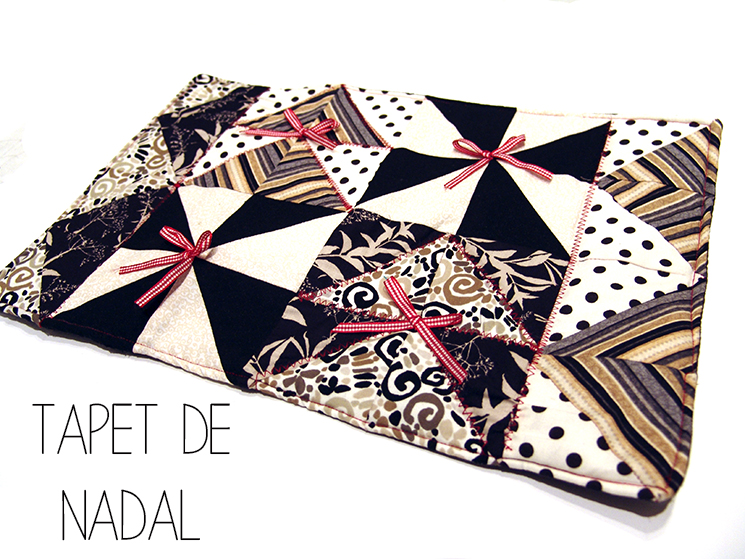
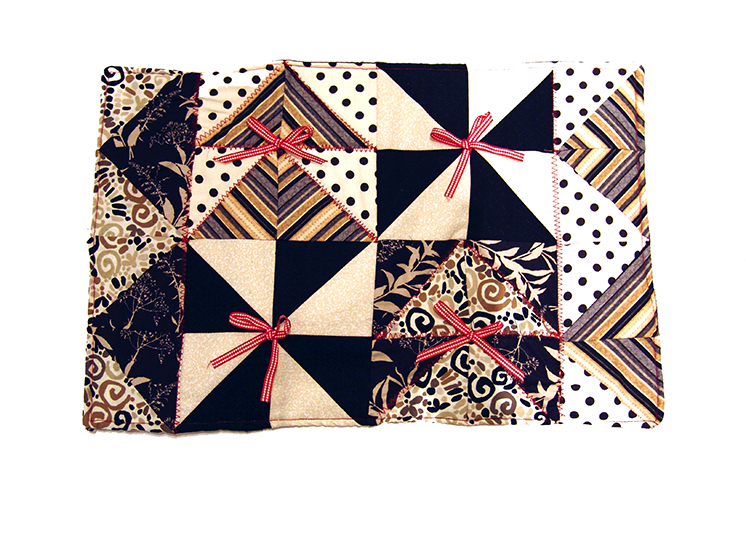
Comencen muntant el tapet, col·locant damunt de la buata, amb agulles, el patchwork i encarem el folre damunt del patchwork (9). Per assegurar-vos millor, embasteu el folre i el patchwork i després els col·loqueu a la buata. Cosim al voltat amb una costura, però deixem un tros sense cosir, per poder girar la labor (10). Abans tallem la buata sobrant (11), girem (12), aplanem i cosim l’obertura (13). Ja tenim el tapet acabat (14), només queda decorar-lo. Podeu fer-ho com vulgueu. Nosaltres hem fet repunts en color vermell, per fer contrast, amb diferents punts de la màquina de cosir i hem aplicat quatre llaçades amb una cinta de quadrets vichy en vermell i blanc.
Ja veieu que no és gaire complicat, depèn de la vostra experiència cosint, i creiem, de debò, que el resultat te l’esperit nadalenc d’aquestes dades.
AMB EL TOC VERMELL FEM NADAL!!!
TUTORIAL PATCHWORK: TAPETE DE NAVIDAD VERSIÓN LES ANTÒNIES.
Este tapete o tapiz, depende del uso que le demos, es muy sencillo de hacer y es nuestra particular visión de la Navidad. Ya sabéis que no somos muy ortodoxas y, al final, siempre damos un giro y nos desviamos del camino, para hacerlo más fácil o para complicarnos la vida. En fin, Les Antònies tenemos espíritu aventurero.
Empezamos el tutorial. Necesitamos 6 retales de telas diferentes de 20cmX20cm (1). Los disponemos de dos en dos y los encaramos (2). La novedad de este tutorial es que os enseñaremos a sacar 8 cuadrados con triángulo de cada pareja. Para hacer esto, dibujamos una cruz aspada de esquina a esquina. Cosemos dos costuras por fuera de cada línea como veis en el dibujo (3). El truco está en cómo cortamos. Por el centro de la línea que hemos dibujado, dejando una costura a cada lado, y por la mitad del cuadro en horizontal y vertical (4). Obtenemos 8 triángulos (5) y, abiertos, nos quedan los 8 cuadrados con triángulo. Al final nos tienen que salir 3 juegos de 8 cuadrados cada uno (6).
Distribuimos como veis en el esquema: 2 tiraslaterales y 4 mini-bloques (7). Coseremos y uniremos el conjunto como siempre hemos hecho: de mini-bloque en mini-bloque; las tiraslaterales; los 4 mini-bloques juntos y, al final, las tiras a cada lado.
Para hacer el tapete, necesitamos: el patchwork, forro de la misma medida que el patchwork y guata algo más grande para trabajar con comodidad (8).
Empezamos montando el tapete, colocando encima de la guata, con alfileres, el patchwork y encaramos el forro encima del patchwork (9). Para aseguraros mejor, hilvanáis el forro y el patchwork y después los colocáis en la guata. Cosemos alrededor con una costura, pero dejamos un trozo sin coser, para poder girar la labor (10). Antes de esto, cortamos la guata sobrante (11), giramos (12), allanamos y cosemos la apertura (13). Ya tenemos el tapeteacabado (14), sólo queda decorarlo. Podéis hacerlo cómo queráis. Nosotras hemos hecho pespuntes en color rojo, para hacer contraste, con diferentes puntos de la máquina de coser y hemos aplicado cuatro lazadas con una cinta de cuadritos Vichy en rojo y blanco.
Ya veis que no es muy complicado, depende de vuestra experiencia cosiendo, y creemos, de verdad, que el resultado tiene el espíritu navideño de estas fechas.
¡¡¡CON EL TOQUE ROJO HACEMOS NAVIDAD!!!
PATCHWORK TUTORIAL: CHRISTMAS TABLE RUNNER LES ANTÒNIES VERSION.
This table runner or tapestry, depends on the use we give, is very simple to make and it’s our own vision of Christmas. You know that we are not very orthodox and, at the end, always give a twist and turn off the road, to make it easier or to complicate life. In the end, Les Antònies have adventurous spirit.
We begin the tutorial. We need 6 different fabric scraps of 20cmX20cm (1). We have them in pairs and face them (2). The novelty of this tutorial is to teach you to have 8 squares with the triangle of each couple. To do this, draw a cross from corner to corner. Sew two seams on the outside of each line as you can see in the drawing (3). The trick is how to cut. Through the centre of the line you have drawn, leaving a seam on each side and by the middle of the square horizontally and vertically (4). Get 8 triangles (5) and open, we are the 8 squares with triangle. At the end we have to leave 3 sets of 8 squares each (6).
Distribute as you can see in the diagram: 2 lateral strips and 4 mini-blocks (7). Sewing and we will attach the set as we have always done: mini-blockon mini-block; side strips; the 4 mini-blocks and, in the end, the strips on each side.
To make the table runner, we need: the patchwork, lining of the same as patchwork and quilting padding a little bigger to work with comfort (8).
Start mounting the table runner, placing on top of the quilting padding, with pins, the patchwork and face the liner on top of the patchwork(9). To ensure better, tacking together lining and patchwork and then put in the quilting padding. Sew around with a seam, but leave a piece without sewing, to be able to rotate the work (10). Before this, we cut the excess of quilting padding (11), turn (12), levelling and sew the opening (13). We already have the finished table runner (14), it remains only to decorate it. You can do it as you like. We have made backstitches in red, by contrast, made with different points of the sewing machine and we applied four bows with a Vichy ribbon in redand white.
As you can see that it’s not very complicated, it depends on your sewing experience, and we believe, seriously, that the result has the Christmas spiritof these time.
WITH THE RED TOUCH WE DO CHRISTMAS!!!


