TUTORIAL NINOT DE PATCHWORK: “CRAFTY MONSTER”.
Deixem una mica de banda els blocs de patchwork per donar-vos idees fàcils i ràpides de realitzar per començar a preparar els regals de Nadal.
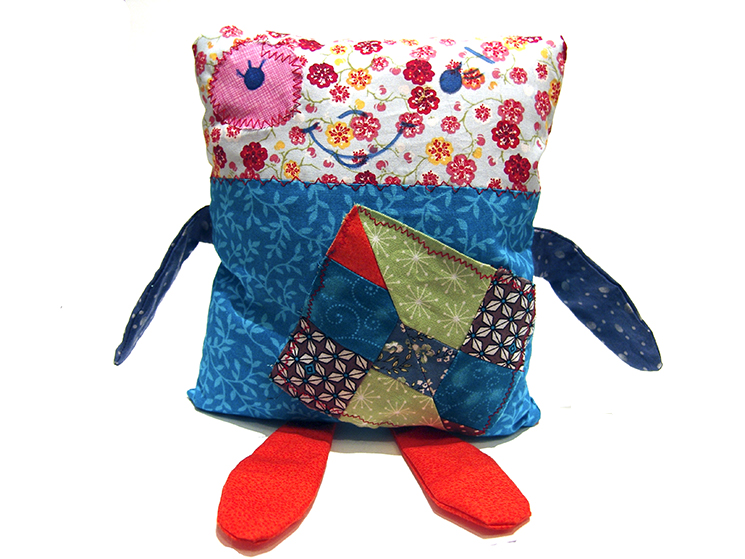
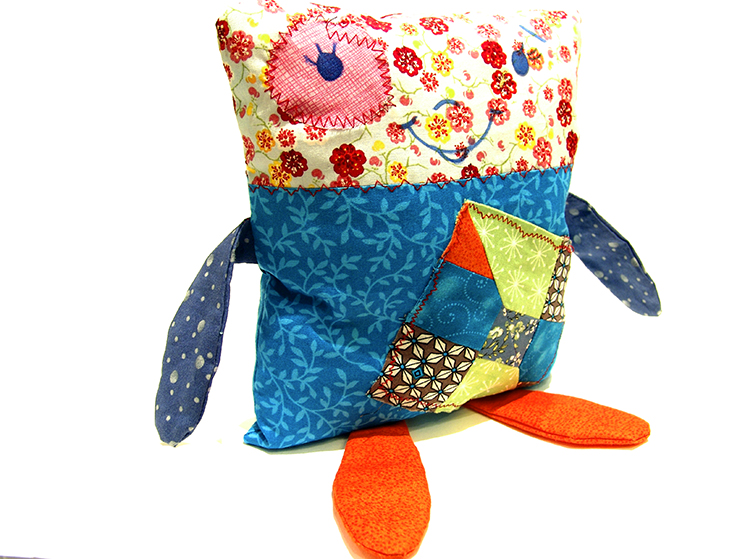
Les Antònies, amb aquest ninot, ens hem volgut crear una mascota moderna, una mica Frankenstein, totalment “Crafty”. Ja veieu que és molt simple i gens sofisticada, però molt simpàtica; apta per qualsevol edat, es pot convertir en un coixí pels més minis de la casa.
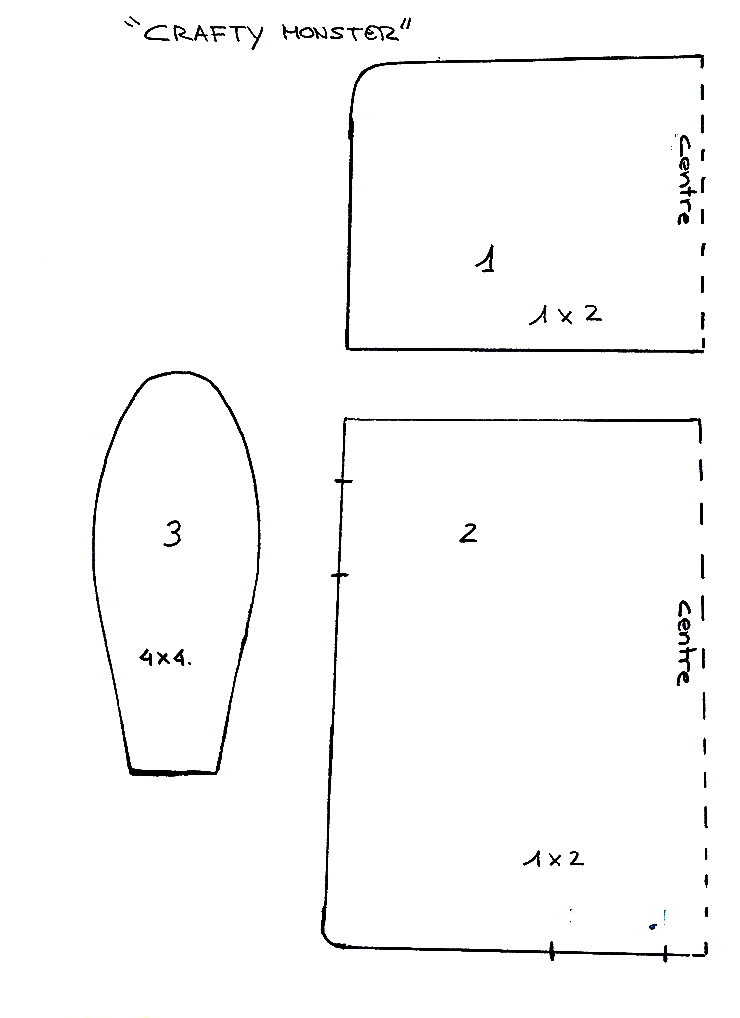
Ara us farem un petit tutorialde com l’hem fet; també us deixem el patró amb les mesures reals, per descarregar-vos-el.
Nosaltres hem treballat amb 4 teles diferents: pel cap, pel cos, per les cames i pels braços. Tallarem, amb la roba plegada, dues vegades el cap i el cos; recordeu de deixar 0,5 cm de marge per fer les costures. Dels braços i les cames heu de fer 4 peces de cada, deixant, també, un marge de 0,5 cm tot al voltant per les costures.
Comencem unint el cap i el cos; ens han de quedar dues peces: una pel davant i una altra pel darrere. Abans d’unir aquestes dues peces, guarnim el ninot. Nosaltres hem aplicat un mini-bloc, que ens havia quedat d’un altre treball, al cos i un cercle, en una altra tela, per fer la base d’un ull, al cap. La boca, el nas i els ulls els hem pintat amb retolador per estampar tela. Hem fet costures ornamentals amb la màquina de cosir, al davant i al darrere, i hem cosit les peces per fer els braços i les cames; la base l’hem deixat sense cosir per poder girar bé les peces. Ja tenim tot i podem començar a muntar nostre “Crafty Monster”.
Com si fossin les nanses d’una bossa, col·loquem els braços i les cames (en el patró veureu que hem fet unes marques per situar aquestes peces) damunt la part davantera del cos; encarem la part del darrere, deixant els braços i les cames dintre, i cosim, tot al voltant; deixem una obertura en una de les cantonades inferiors, per poder girar el ninot del dret i poder farcir-lo. Quan ja tenim el ninot farcit amb la buata de l’interior d’un coixí, cosim l’obertura i ja podem donar-lo per acabat.
Potser no és el més maco dels ninots, però és el nostre “Crafty Monster” i esperem que també l’adopteu com a mascota.
UN COSÍ LLUNYÀ D’EN BOB ESPONJA!!!
TUTORIAL MUÑECO DE PATCHWORK: “CRAFTY MONSTER”.
Dejamos un poco de lado los bloques de patchwork para daros ideas fáciles y rápidas de realizar para empezar a preparar los regalos de Navidad.
Les Antònies, con este muñeco, hemos querido crear una mascota moderna, un poco Frankenstein, totalmente “Crafty”. Ya veis que es muy simple y nada sofisticada, pero muy simpática; apta para cualquier edad, se puede convertir en un cojín para los más minis de la casa.
Ahora os daremos un pequeño tutorial de cómo lo hemos hecho; también os dejamos el patrón con las medidas reales, para descargároslo.
Nosotras hemos trabajado con 4 telas diferentes: para la cabeza, para el cuerpo, para las piernas y para los brazos. Cortaremos, con la ropa doblada, dos veces la cabeza y el cuerpo; recordad de dejar 0,5 cm de margen para hacer las costuras. De los brazos y las piernas tenéis que hacer 4 piezas de cada, dejando, también, un margen de 0,5 cm todo alrededor para las costuras.
Empezamos uniendo la cabeza y el cuerpo; nos tienen que quedar dos piezas: una por delante y otra por detrás. Antes de unir estas dos piezas, decoramos el muñeco. Nosotros hemos aplicado un mini-bloque, que nos había quedado de otro trabajo, al cuerpo y un círculo, en otra tela, para hacer la base de un ojo, a la cabeza. La boca, la nariz y los ojos los hemos pintado con rotulador para estampar tela. Hemos hecho costuras ornamentales con la máquina de coser, delante y detrás, y hemos cosido las piezas para hacer los brazos y las piernas; la base lo hemos dejado sin coser para poder girar bien las piezas. Ya tenemos todo y podemos empezar a montar nuestro “Crafty Monster”.
Como si fueran las asas de una bolsa, colocamos los brazos y las piernas (en el patrón veréis que hemos hecho unas marcas para situar estas piezas) sobre la parte delantera del cuerpo; encaramos la parte trasera, dejando los brazos y las piernas dentro, y cosemos, todo alrededor; dejamos una apertura en una de las esquinas inferiores, para poder girar el muñecodel derecho y poder rellenarlo. Cuando ya tenemos el muñeco rellenado con la guata del interior de un cojín, cosemos la apertura y ya podemos darlo por acabado.
Quizás no es el más bonito de los muñecos, pero es nuestro “Crafty Monster” y esperamos que también lo adoptéis como mascota.
PATCHWORK DOLL TUTORIAL: «CRAFTY MONSTER».
We let a side the patchwork blocks to give you quick and easy ideas to begin to prepare Christmasgifts.
Les Antònies, with this doll, wanted to create a modern pet, a little Frankenstein, totally «Crafty«. As you can see it’s very simple and not at all sophisticated, but very friendly; suitable for any age, can become a pillow for the minis of the home.
Now we are going to do a little tutorial of how we have done; now also the pattern with actual measurements, we leave for you download it.
We have worked with 4 different fabrics: the head, the body, the legs and arms. Cut, with the folded clothes, twice the head and body; remember to leave 0, 5 cm margin to make the seams. Of arms and legs you have to make 4 pieces of each, leaving, too, a margin of 0.5 cm all around the seams.
We begin by binding the head and body; we must keep two pieces: one in front and another behind. Before you binding these two pieces, we decorated the doll. We have applied a mini-block, which we had been of another work, to the body and a circle in another fabric, to make the core of an eye, in the head. The mouth, nose and eyes are painted with marker for printing cloth. We made ornamental seams with sewing machine, at the front and at the back, and we have sewn the pieces to make the arms and legs; the base has been left without sewing in order to turn the pieces. We already have everything and we can begin to mount our «Crafty Monster».
As if they were the handles to a bag, place the arms and legs (in the pattern you’ll see that we’ve done a few brands to place these pieces) on the front of the body; time to face the rear, leaving the arms and legs inside, and sew, all around; leave an opening in one of the lower corners, in order to turn the doll and be able to stuff it. When we already have the doll stuffed with the padding of the inside of a pillow, sew the opening and we can give it to finish.
Maybe it’s not the most handsome of the dolls, but it is our “Crafty Monster” and hopefully also adopt as a pet.
A DISTANT COUSIN OF SPONGEBOB!!!


