Tutorial: Cojin de estrella / Tutorial: Star pillow
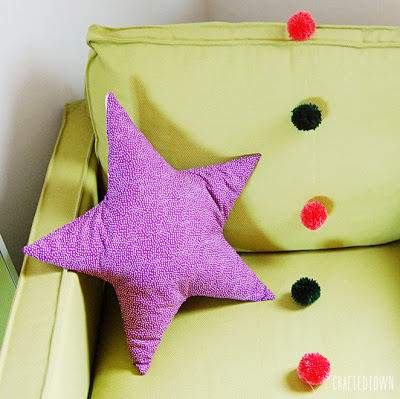
Hemos comenzado un nuevo mes y mi cabeza ya esta empezando a pensar en la próxima estación. Durante mis vacaciones hice una nueva funda para un cojín del sofá y quería añadir algún otro, pero diferente de los típicos. Así, que he decidido diseñar el mio propio. ¿Os gusta?
A new month has begun and my mind is starting to think in the next Season. During my holidays a made a new cover for a pillow of the sofa and I wanted to add another pillow, but different from the typical. So, I have decided to design my own pillow and make it. Do you like it?
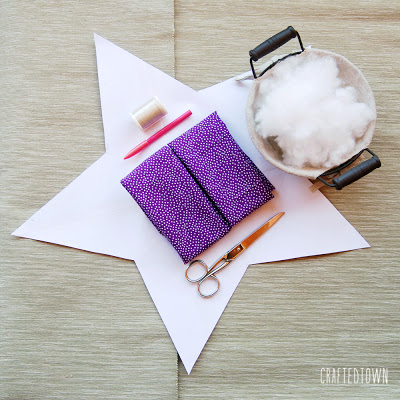
- Dos piezas de tela de (50x55cm)
- Tijeras
- hilo
- Plantilla de estrella (descargar desde aquí)
- Lápiz para marcar tela
- Fibra para rellenar
- Alfileres
- Two pieces of fabric (50x55cm)
- Scissors
- Thread
- Star pattern (download here)
- Dressmaker pencil
- Refill fiber
- Pins
How to make it?
Antes de empezar hay que imprimir la plantilla con forma de estrella y recortarla.
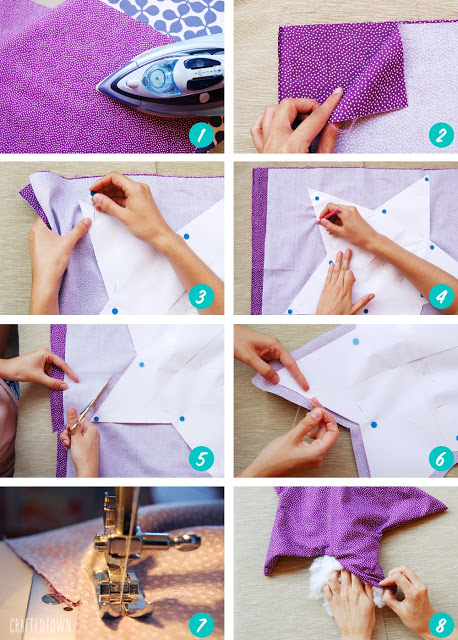
1. Plancha las piezas de tela.
2. Encara las partes frontales de las telas.
3. Fijar la plantilla de la estrella a las telas con alfileres.
4. Ahora marcar la forma de la estrella con el lápiz marcador en la tela.
5. Cortar la tela con la forma de estrella dejando un margen de 1 cm desde la línea que habías marcado.
6. Hilvanar la funda antes de coserla y marcar un espacio de 10 cm para no coserlo.
7. Coser la funda con la máquina de coser y no os olvidéis de dejar el espacio de 10 cm sin coser.
8. Darle la vuelta a la funda a través del agujero de 10 cm que habéis dejado sin coser y rellenarlo con la fibra. Finalmente, para acabarlo debéis coser el agujero que habíamos dejado con punto invisible y listo!
Si os animáis a hacerlo y queréis compartir el resultado, por favor compartirlo dejando un comentario con el link 😉
Feliz lunes!
………………………………………..
Before begin print the star pattern and cut it out.
1. Iron the fabrics.
2. Put face to face the two fabrics.
3. Fix the star pattern with pins to the fabrics.
4. Now mark the star shape on the fabrics with the dressmaker pencil.
5. Cut the shape out leaving a margin of 1 cm from the mark you have made previously.
6. Baste the cover before sewing and mark a space of about 10 cm to leave without sewing.
7. Sew the cover with the sewing machine and don’t forget to leave without sew the space of 10 cm.
8. Turn over the cover through the hole you have left it without sew and fill it with the fiber. Finally, to finish it sews the whole we had left with and invisible stitch.
If you try to make it I would like to see your results, please share leaving a comment with your link 🙂
Happy Monday.
Visita la entrada original AQUÍ


