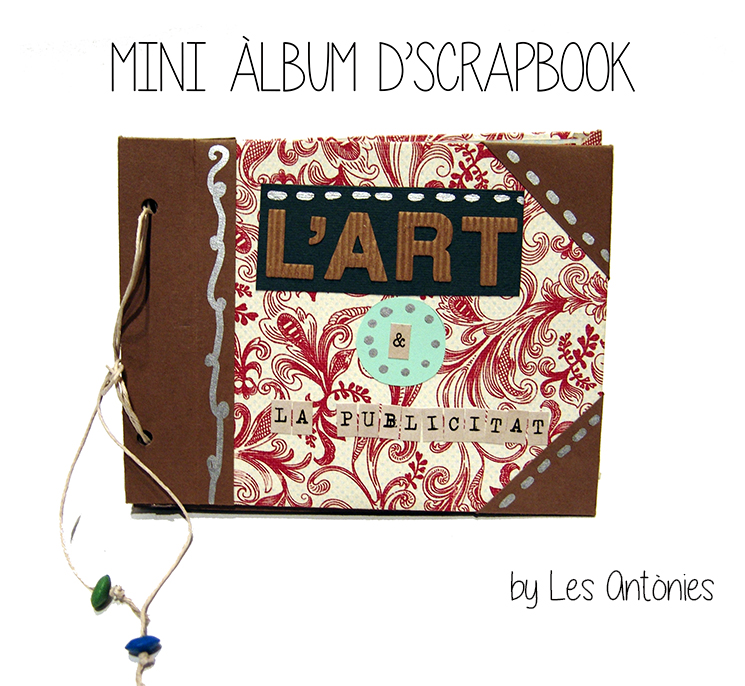
MINI-ÀLBUM L’ART I LA PUBLICITAT: TUTORIAL D’SCRAPBOOK.
El projecte que Les Antònies us presentem en aquest post és un nou experiment en l’art de l’scrapbooking. Ens hem inspirat en el món de la publicitati la relació que els artistes han tingut amb ell.
Buscant entre els nostres “arxius” vàrem trobar un reportatge antic sobre aquest tema. Com que les reproduccions dels cartells publicitaris estaven impecables ens decidirem a fer un mini-àlbum amb elles.
Com ja us avançàvem en el post anterior, part d’aquest projecte està realitzat amb els materials que vàrem comprar i l’altra part amb materials trobats, reciclats i refets.
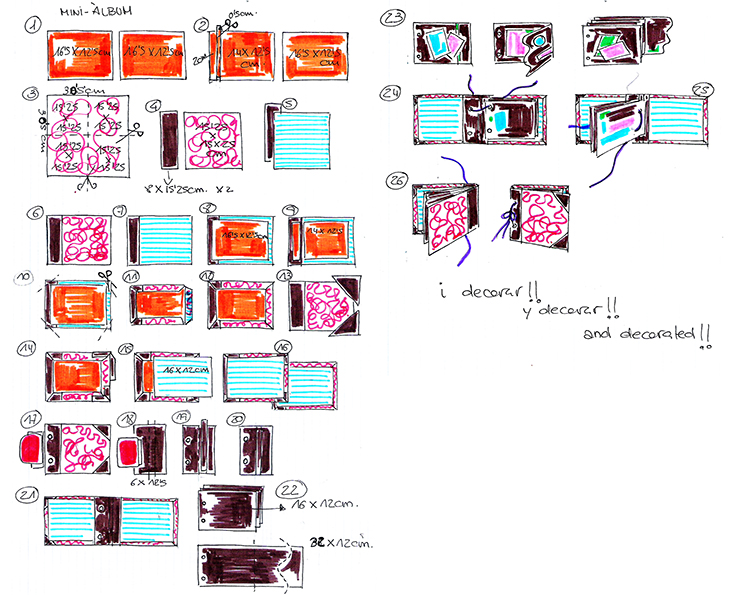
Comencem amb el tutorial. Per fer les portades necessitem dos cartrons de 16’5cmX12’5cm (1); nosaltres hem fet servir una caixa de cereals. En un d’aquests cartrons marquem, com veieu al dibuix, 2cm/0’5cm/14cm: retallem i reservem la tira de 2cmX12’5cm i el rectangle de 14cmX12’5; l’altre cartró el deixem igual (2). Ara agafem el paper d’Scrapbook de 30’5cmX30’5cm i el retallem en 4 parts iguals: 15’25cmX15’25cm (3). En una cartolina llisa, que faci contrast amb el paper d’Scrapbook, retallem 2 peces de 8cmX15’25cm que unirem a 2 dels quadrats que hem tallat del paper estampat (4). Les passes següents les farem amb els dos jocs: com que el paper d’Scrapbook està estampat per les dues cares, escollim quina volem a la portada; amb cel·lo de doble cara unim la cartolina llisa amb el paper (5), de manera que, per la part que serà la portada, la cartolina quedi per davant del paper estampat (6); girem (7) i ja podem enganxar el cartró contraportada centrat (8) i els cartrons portada, també centrats (9) deixant 0’5cm de marge entre les dues parts per donar joc a l’hora de poder obrir el mini-àlbum. Ara només ens queda retallar les puntes del paper, deixant uns mm de marge (10) plegar (11) i enganxar al cartró (12). Abans d’acabar les tapes, hem volgut guarnir la portada posant unes punteres al davant (13); hem plegat i enganxat (14) igual que abans. Ara si, acabem les tapes enganxat a l’interior de la portada i la contraportada, amb el revers del paper estampat, dos peces de 16cmX12cm (15) per tapar el cartró. Ja tenim les tapes acabades (16).
Anem per la següent fase. Primer farem dos forats a la portada (17). Amb la mateixa cartolina llisa, preparem el llom del nostre mini-àlbum. Tallarem una peça de 6cmX12,5cm i farem dos forats igual que a la portada (18). Al centre d’aquesta peça marcarem un plec d’1cm, farem amb cartolina una espina d’aquesta amplada i l’enganxarem al damunt del plec, per reforçar-lo (19); ja tenim el llom del mini-àlbum (20). Unirem la portada, el llom i la contraportada de la següent manera: farem coincidir els forats de la portada i el llom, enganxarem i unirem la contraportada al conjunt separada de la portada pel plec del llom (21). Pels fulls del mini-àlbum hem fet servir la mateixa cartolina llisa: hem fet fulls de 16cmX12cm i de dobles de 32cmX12cm, que hem plegat pel mig i hem retallat fent un ornament (22); podeu fer els que vulgueu. Després de fer els forats com els de la portada, podeu començar a decorar el fulls (23), això ja és cosa de la vostra inspiració.
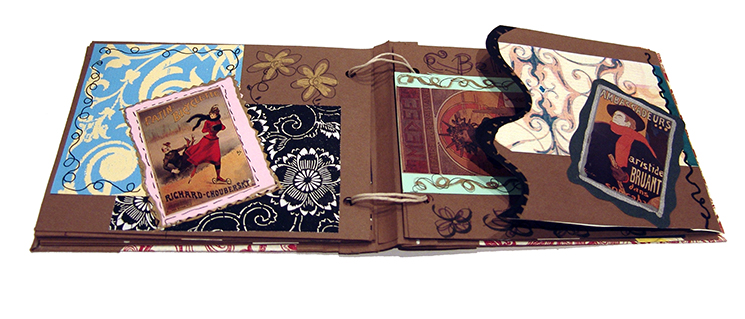
Acabarem el mini-àlbumunint els fulls decorats a les tapes. Passem el cordó pel forat superior de la portada i dels fulls (24) i de l’últim full a la portada pel forat inferior (25). Tanquem per davant amb una llaçada i només queda decorar, al vostre gust, la portada (26).
Esperem que us agradi aquest mini-àlbum i el tutorialus serveixi d’inspiració.
ELS ARTISTES ELEVEN LA PUBLICITAT A LA CATEGORIA D’ART!!!
MINI-ÁLBUM EL ARTE Y LA PUBLICIDAD (L’ART I LA PUBLICITAT): TUTORIAL DE SCRAPBOOK.
El proyecto que Les Antònies os presentamos en este post es un nuevo experimento en el arte del scrapbooking. Nos hemos inspirado en el mundo de la publicidad y la relación que los artistas han tenido con él.
Buscando entre nuestros “archivos” encontramos un reportaje antiguo sobre este tema. Ya que las reproducciones de los carteles publicitarios estaban impecables nos decidimos a hacer un mini-álbum con ellas.
Como os avanzamos en el post anterior, parte de este proyecto está realizado con los materiales que compramos y la otra con materiales encontrados, reciclados y rehechos.
Comencemos el tutorial. Para hacer las portadas necesitamos dos cartones de 16’5cmX12’5cm (1); nosotras hemos usado una caja de cereales. En uno de estos cartones marcamos, como veis en el dibujo, 2cm/0’5cm/14cm: recortamos y reservamos la tira de 2cmX12’5cm y el rectángulo de 14cmX12’5; el otro cartón lo dejamos igual (2). Ahora cogemos el papel de Scrapbook de 30’5cmX30’5cm y lo recortamos en 4 partes iguales: 15’25cmX15’25cm (3). En una cartulina lisa, que haga contraste con el papel de Scrapbook, recortamos 2 piezas de 8cmX15’25cm que uniremos a 2 de los cuadrados que hemos cortado del papel estampado (4). Los pasos siguientes los haremos con los dos juegos: como que el papel de Scrapbook está estampado por las dos caras, escogemos cual queremos en la portada; con celo de doble cara unimos la cartulina lisa con el papel (5), de manera que, por la parte que será la portada, la cartulina quede por delante del papel estampado(6); giramos (7) y ya podemos pegar el cartón contraportada centrado (8) y los cartones portada, también centrados (9) dejando 0’5cm de margen entre las dos partes para dar juego a la hora de poder abrir el mini-álbum. Ahora solo nos queda recortar las puntas del papel, dejando unos mm de margen (10) plegar (11) y pegar al cartón (12). Antes de acabar las tapas, hemos querido decorar la portada poniendo unas punteras delante (13); hem plegado y pegado (14) igual que antes. Ahora sí, acabamos las tapas pegando en el interior de la portada y la contraportada, con el reverso del papel estampado, dos piezas de 16cmX12cm (15) para tapar el cartón. Ya tenemos las tapas acabadas (16).
Vamos por la siguiente fase. Primero haremos dos agujeros en la portada (17). Con la misma cartulina lisa, preparamos el lomo del mini-àlbum. Cortaremos una pieza de 6cmX12’5cm y haremos dos agujeros igual que en la portada (18). En el centro de esta pieza marcaremos un pliegue de 1cm, haremos con cartulina una espina de este ancho y la pegaremos sobre el pliegue, para reforzarlo (19); ya tenemos el lomo del mini-álbum (20). Uniremos la portada, el lomo y la contraportada de la siguiente manera: haremos coincidir los agujeros de la portada y el lomo, pegaremos y uniremos la contraportada al conjunto separada de la portada por el pliegue del lomo (21). Para las páginas del mini-àlbum hemos usado la misma cartulina lisa: hemos hecho páginas de 16cmX12cm y dobles de 32cmX12cm, que hemos plegado por el medio y hemos recortado haciendo un ornamento (22); podéis hacer las que queráis. Después de hacer los agujeros como los de la portada, podéis empezar a decorar las páginas (23), esto ya es cosa de vuestra inspiración.
Acabaremos el mini-álbum uniendo las páginas decoradas a las tapas. Pasamos el cordón por el agujero superior de la portada y de las páginas (24) y de la última página a la portada por el agujero inferior (25). Cerramos por delante con una lazada y solo queda decorar, a vuestro gusto, la portada (26).
Esperamos que os guste este mini-álbum y el tutorial os sirva de inspiración.


¡¡¡LOS ARTISTAS ELEVAN LA PUBLICIDAD A LA CATEGORÍA DE ARTE!!!
MINI-ALBUM ART AND ADVERTISING (L»ART I LA PUBLICITAT): SCRAPBOOK TUTORIAL.
The project that Les Antònies are presenting in this post is a new experiment in the art of scrapbooking. We are inspired by the world of advertising and the relationship that artists have had with him.
Looking for among our «archives» we find an article about this topic. Because the reproductions of posters were impeccable, we decided to make a mini-album with them.
As we advanced you in the previous post, part of this project is done with the materials that we buy and the other part with found materials, recycled and redone.
Let»s start with the tutorial. To make the covers need two cartons of 16″5cmX12″5cm (1); we have used a box of cereal. In one of those cardboard mark, as you can see in the drawing, 2 cm/0‘5 cm/14 cm: cut and reserve the strip of 2cmX12″5cm and the rectangle of 14cmX12″5; the other cardboard we left equal (2). Now take the Scrapbook paper 30″5cmX30″5cm and cut into four equal parts: 15″25cmX15″25cm (3). In a smooth cardboard, to contrast with the scrapbook paper, cut 2 pieces of 8cmX15″25cm that we will attach 2 of the squares that we cut of the printed paper (4). The following steps we will do it with the two games: as the Scrapbook paper is printed on both sides, we choose what we want on the cover; with double-sided tape unite the cardboard with the paper (5), so that, for the part that is going to be the cover, the cardboard is ahead of printed paper (6); turn (7) and you can paste the cardboard back cover focused (8) and the cardboard cover, also focused (9) leaving 0″5cm of the margin between the two parties to give game to be able to open the mini-album. Now we can only trim the tips of the paper, leaving a few mm of margin (10) fold (11) and paste on cardboard (12). Before the end of the covers, we wanted to adorn the cover by putting a triangle in front of them (13); we folded and glued (14) as before. Now if we just tops stuck to the inside of the cover and the back cover with the back of a printed paper, two pieces of 16cmX12cm (15) to cover the cardboard. We have the finished covers (16).
We»re going to the next phase. First we will make two holes on the cover (17). With the same smooth cardboard, prepare the spine of our mini-album. Cut a piece of 6cmX12, 5 cm and make two holes like that on the cover (18). In the centre of this piece mark a fold, we will do with cardboard a thorn in this width and glued above the fold, to reinforce it (19); we already have the spine of the mini-album(20). We will attach the cover, spine and back cover as follows: we will match the holes of the cover and the spine, glued and we will attach the cover to the group separated from the cover by the specification of the spine (21). For do the sheets of the mini-album we have used the same smooth cardboard: we made spreadsheets 16cmX12cm and 32cmX12cm doubles, we folded in half and we cut out making an ornament (22); you can do all you want. After making the holes as the front page, you can begin to decorate the sheets (23); this is already a thing of your inspiration.
We will finish the mini-album by joining the sheets featuring the covers. Pass the cord through the superior hole in the cover and sheets (24) and the last leaf on the cover by the lower hole (25). We closed in front with a loop and just decorating, to your taste, the cover (26).
We hope you enjoy this mini-album and the tutorial will serve as an inspiration.

THE ARTISTS RAISE THE ADVERTISING TO ART!!!


