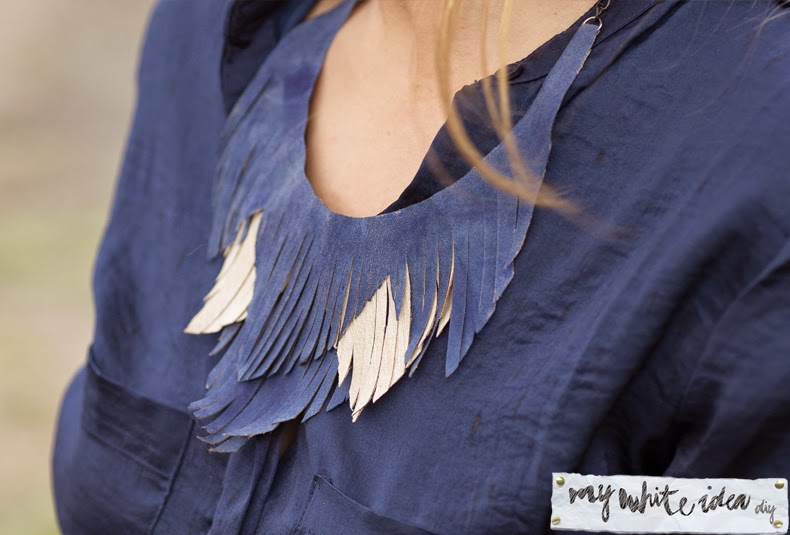
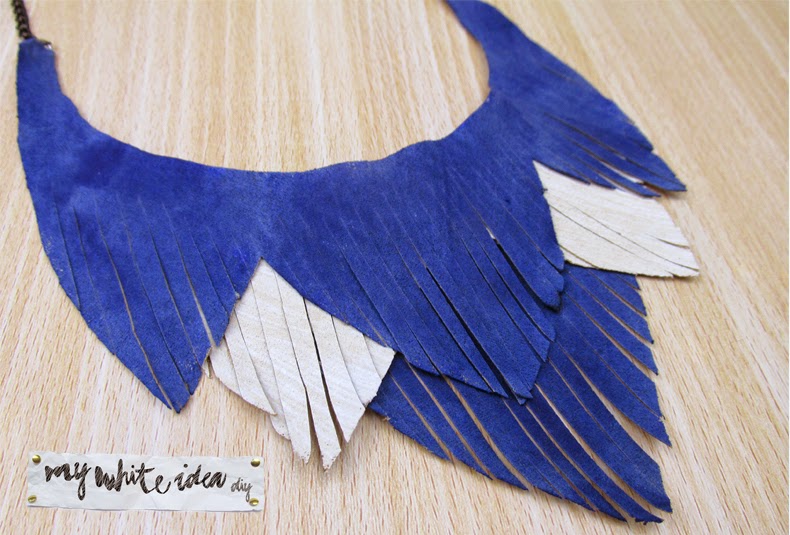
FRINGE NECKLACE DIY
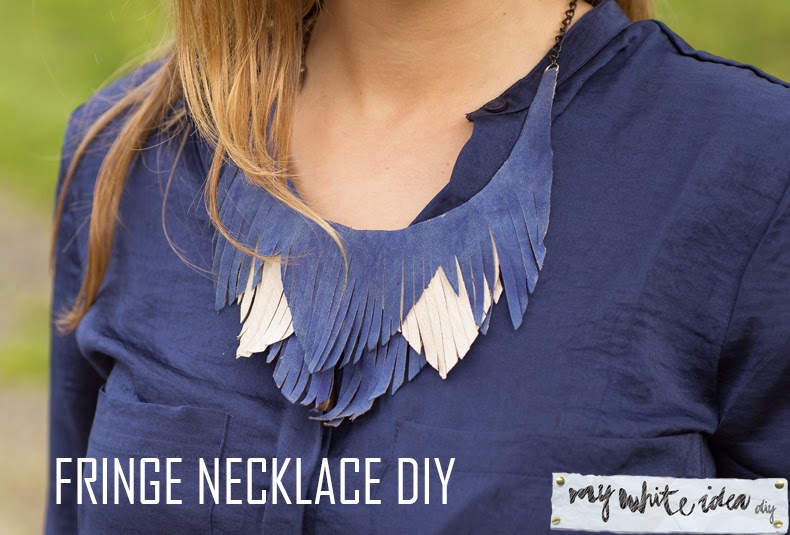
Los flecos están más de moda que nunca así que decidí que este collar fuese uno de los talleres que impartí en el DIY HUNTERS DAY.
Antes de nada, quiero dar las gracias tanto al equipo de Handbox y a Yo Dona por contar conmigo, me lo pasé genial, aprendí un montón y sobre todo disfruté un muchísimo enseñando a las mejores alumnas del mundo (por si hay dudas estoy siendo 100% objetiva) a hacer este collar y el otro taller (que subiré en unos días)
Entrando en materia, lo mejor de este DIY es la cantidad de opciones que tiene,esto es simplemente una idea, pero se puede hacer de muchísimas formas diferentes, cambiando el color, el tamaño, la longitud, poniendo más capas, etc..
Al final del post os dejo las preciosas creaciones de las chicas que acudieron a taller!!
The fringes are more fashionable than ever so I decided to made this necklace in the workshops of the DIY HUNTERS DAY.
Thanks handbox and Yo Dona for trust in me! I learned a lot and especially enjoyed a lot teaching to the best students in the world ( I»m being 100% objective) to make this necklace and another workshop (which I will post in a few days)
The best of this DIY is all options it has, this is just an idea, but can be done in many different ways, changing the color, size, length, putting more layers, more and more.
At the end of the post I show the beautiful creations of the girls who came to workshop !!
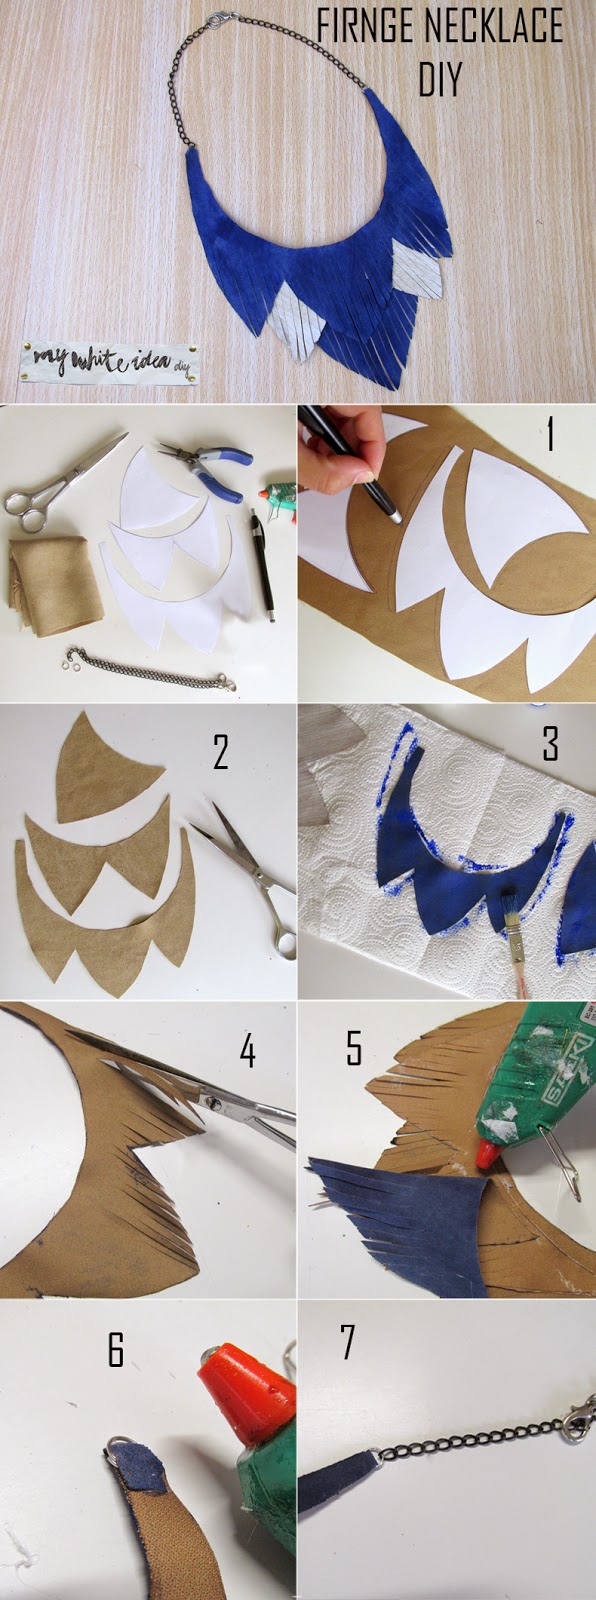
Materialales
Tela (antelina o una tela que sea gruesa, se pueda pintar y que no deshilache mucho, tijeras, boli, pistola de silicona, cadena, aradelas, pintura para tela, plantilla, cierre y alicates)
Pasos
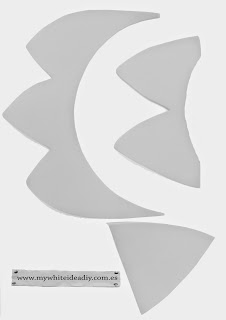
Paso 1: Calcar la plantilla en la parte trasera de la tela.
Paso 2:Cortar la tela
Paso 3: Pintar las piezas y esperar a que sequen
Paso 4: Cortar los flecos.
Paso 5: Pegar las piezas de modo que por la cara frontal del collar, se asomen los flecos y no se vea la unión.
Paso 6: Introducir las arandelas el las partes superiores del collar, doblar y pegar.
Paso 7: Colocar la cadena con el cierre.
Materials
Fabric (suede or similar), scissors, pen, glue gun, chain, washers, fabric paint, pattern, closure and pliers)
Steps
Step 1: Tracing the template in the back of the fabric.
Step 2: Cut the fabric
Step 3: Paint the pieces and wait.
Step 4: Cut the fringes when the pieces are dry.
Step 5: Glue the pieces so that the front of the necklace, you can see the fringes of the 3 pieces but not the place where you put the glue.
Step 6: Insert the washers on the upper parts of the collar, fold and paste it.
Step 7: Place the chain and the closure.
Aquí podéis ver en plena acción a todas las chicas, una de las cosas que más me gustó es que todas lo hicieron diferente y le añadieron su toque personal.
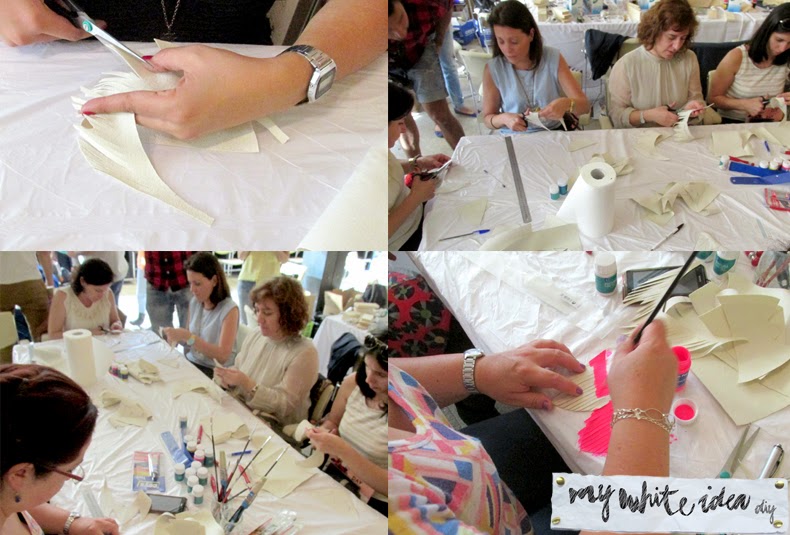
Estas son las creaciones de dos de las chicas que vinieron que al llegar a casa decidieron hacerlo todavía más único haciendo dibujos geométricos, me encantan!


¡¡Muchísimas gracias a todas!!!


