Flores de papel crepe: ranúnculos

¡Hola a todos! Desde hace algunos días he estado adelantándoles por Instagram este proyecto, incluso hice un “en vivo” para mostrarles el paso a paso in situ.
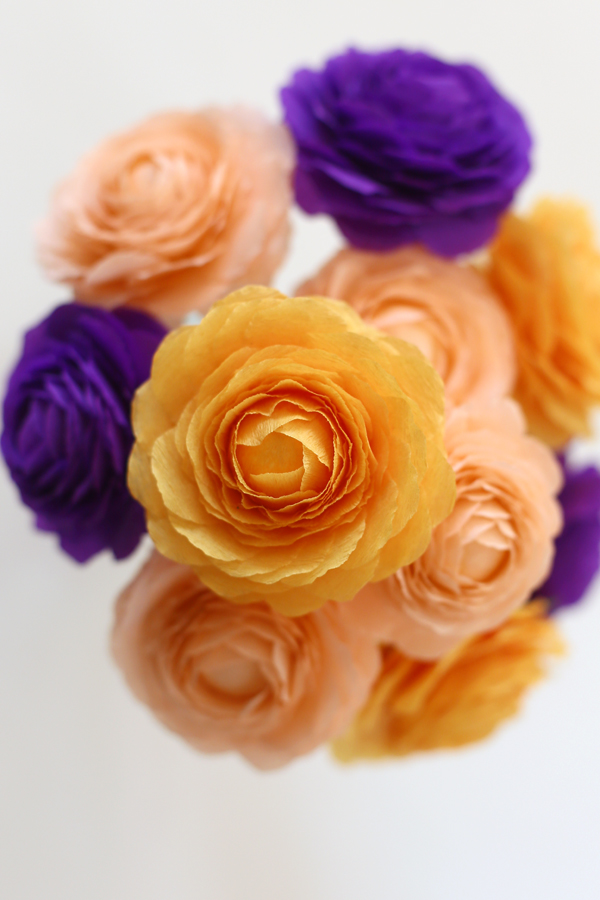
Estos ranúnculos de papel crepé son increíblemente parecidos a los reales, con la ventaja de que su vida es más larga, y por supuesto, están hechos con nuestras manos.
Los pueden usar para un ramo, coronas para el pelo o para la pared.
Mi consejo es que se tomen su tiempo para fabricarlos, no es un trabajo rápido, pero sirve para cultivar la paciencia y relajarse.
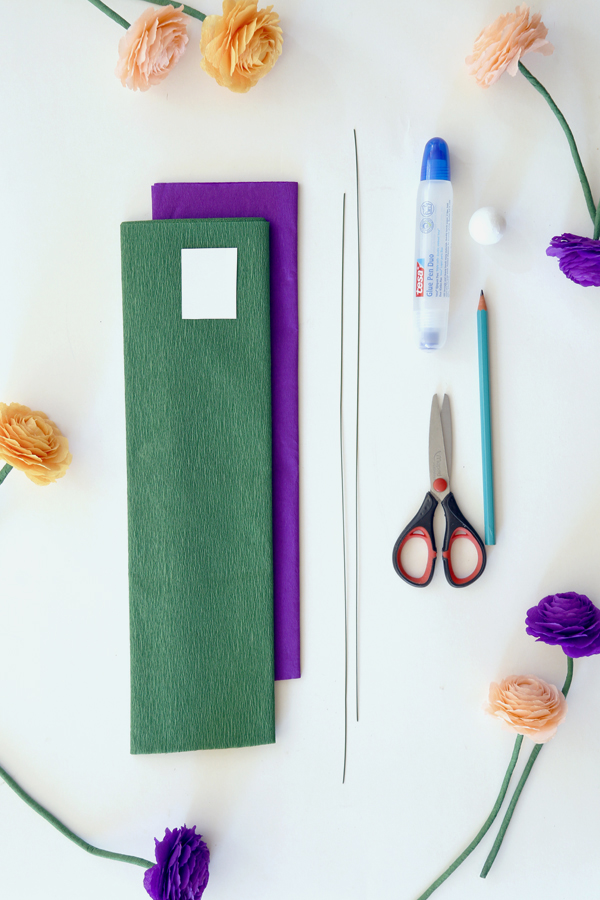
Materiales:
- Papel crepé verde y de otros colores
- Alambre para flores o uno delgado.
- Pelotas de plumavit de 2,5 cms.
- Pegamento transparente o cola fría, idealmente que tenga punta fina. Si no, pueden usar un mondadientes para aplicarlo.
- Tijeras
- Trozo de cartón delgado
- Lápiz
• • •
Crepe paper flowers : Buttercups or ranunculus
Hi everyone! Over the last few days I’ve been giving you some previews via Instagram of this project. I even made a live video to show you the step by step process in situ.
These crepe paper buttercups are incredibly similar to the real ones with the advantage that their life span is longer and, of course, they’re made with our own hands. You can use them for a bouquet of flowers, a flower hair band or to put on your wall.
My advice is: take your time to make them, it’s not a quick task but it helps for working on our patience and to relax.
Materials:
- Green and other coloured crepe paper.
- Flower wire or a thin wire.
- 2,5 cm diameter Styrofoam balls.
- Transparent glue or white glue. Ideally with a thin nozzle. If not, you can use a toothpick to apply it.
- Scissors
- A piece of a thin cardboard
- A pen
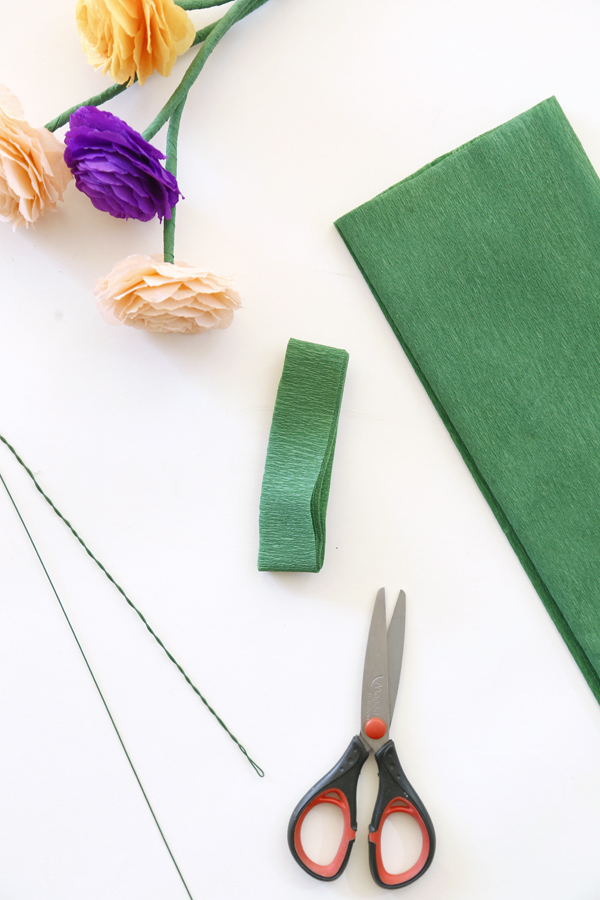
Toma el alambre para flores, y si es muy largo, dóblalo por la mitad y gíralo hasta conseguir una pieza más gruesa.
Sin abrir el papel crepé verde, corta una tira de unos 2 o 3 cms. de ancho para cubrir el alambre.
• • •
Grab the wire and if it is too long, fold it in half and twist it till you get a thicker piece.
Without opening the green crepe paper, cut a strip of about 2 to 3 cms wide to cover the wire.
Comienza pegando la parte superior, donde se unen las puntas, luego baja, vuelve a subir y por último vuelve a bajar. En mi caso decidí hacerlo tres veces, ya que el tallo del ranúnculo es bastante grueso.
IMPORTANTE: Deja el extremo superior, es decir, donde se juntan ambas puntas, cubierto sólo por una capa de papel, tal como se ve en la foto.
• • •
Start gluing the upper part where the tips meet then go down and up again and finally go down one more time. In my case I decided to do this three times given that the stem of a buttercup is really thick.
IMPORTANT: Leave the upper end, the one where both tips meet, covered by only one layer of paper, as shown in the picture.

Entierra la pelota de plumavit en el alambre (en la parte que cubriste una vez), y agrega pegamento para que fije bien. Deja secar.
• • •
Attach the Styrofoam ball to the wire (in the part that you only covered with one layer of paper) and add fix with some glue. Leave to dry.

Dibuja en el cartón un rectángulo de 2 x 2,5 cms, y en él, la figura de un pétalo. Recórtalo.
Toma el papel de color, y en una tira de unos 2,5 cms de ancho usa el molde para cortar grupos de varios pétalos. No los separes aún.
• • •
Draw a 2 x 2,5 cm rectangle on the cardboard and in it, draw a petal shape. Cut it using the scissors.
Grab the colour paper and in a strip 2,5 cm wide use the mould you made to cut lots of petals. Don’t separate them yet.

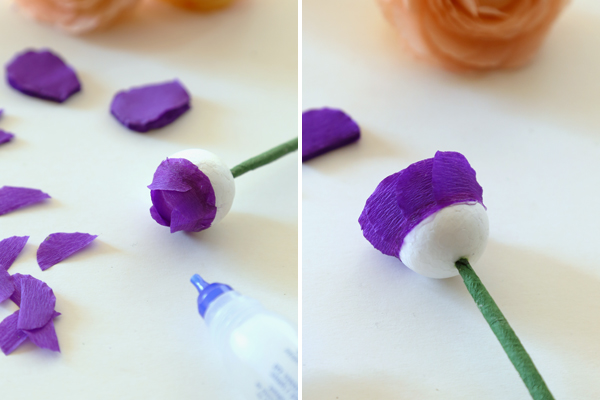
Cuando tengas suficientes montoncitos, toma uno y corta aproximadamente 1/3 del pétalo. Sepáralos.
Corta un círculo del papel de color y pégalo en la parte superior de la pelota de plumavit.
A continuación, comienza a pegar los pétalos cortados, a unos 5 milímetros del centro, y superponiendo uno sobre otro. Es decir, el segundo pétalo debe cubrir el 50% del primero, y así sucesivamente.
Usa el pegamento sólo en la parte recta del pétalo para que tengan movimiento y queden en 3 dimensiones.
Continúa pegando, verás como poco a poco comienzas a descender por la pelota.
Cuando hayas cubierto cerca de 1/3 de ella, toma otro grupo de pétalos y córtalos, esta vez, por la mitad. Pégalos siguiendo la misma técnica.
• • •
Once you have enough piles of petals, take one pile and make a cut along approximately, one third of the petal. Separate them out.
Cut a circle with the colour paper and glue it to the upper part of the Styrofoam ball.
Now, start gluing the petals at about 5 mm from the center and overlapping them. The second petal should cover 50% of the first one and successively.
Use the glue only in the straight part of the petal so can still move freely and appears 3D.
Continue gluing the petals and you’ll see how, slowly, you start going down the ball.
When you have approximately a third of the ball covered, grab another group of petals and this time cut them in half. Glue them to the ball following the same technique.

Cuando ya hayas pasado la mitad de tu pelota, cambia a los pétalos completos y pégalos hasta llegar a la base de tu flor.
Una vez lista, puedes agregar los detalles como las pequeñas hojas bajo el ranúnculo. Sólo corta papel crepé verde en forma de hoja alargada y pega unas 4 o 5.
¡Con esto ya habrás terminado!
• • •
When you reach over the half of the ball switch to the whole petals and glue them until reaching the base of your flower.
Once it’s ready you can add the small details like the little leaves under the buttercup. Just cut some leaf shapes on the green crepe paper and glue some 4 or 5 of them to the stem.
With this you’re done!

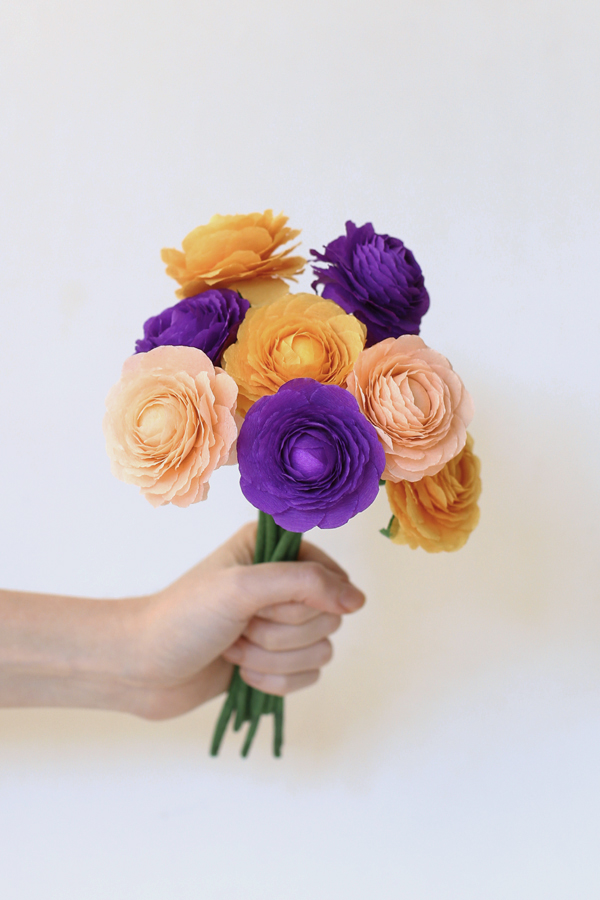
Como les decía al comienzo pueden hacer varias y crear un pequeño bouquet o usarlas para decorar. Las posibilidades son infinitas.
• • •
As I told you at the beginning of the post, you can make several of these and create a small bouquet of flowers or use them to decorate. The possibilities are endless!


Espero que les haya gustado y que las hagan, ¡no van a poder parar!
Cariños, Cony
• • •
I hope you liked them and that you make them. You’re not going to be able to stop!
Lots of love, Cony


