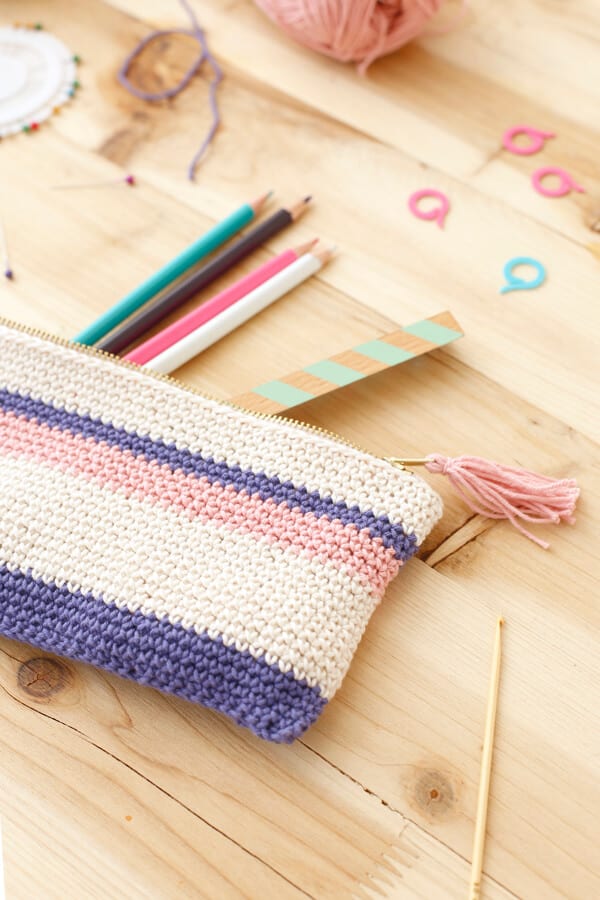
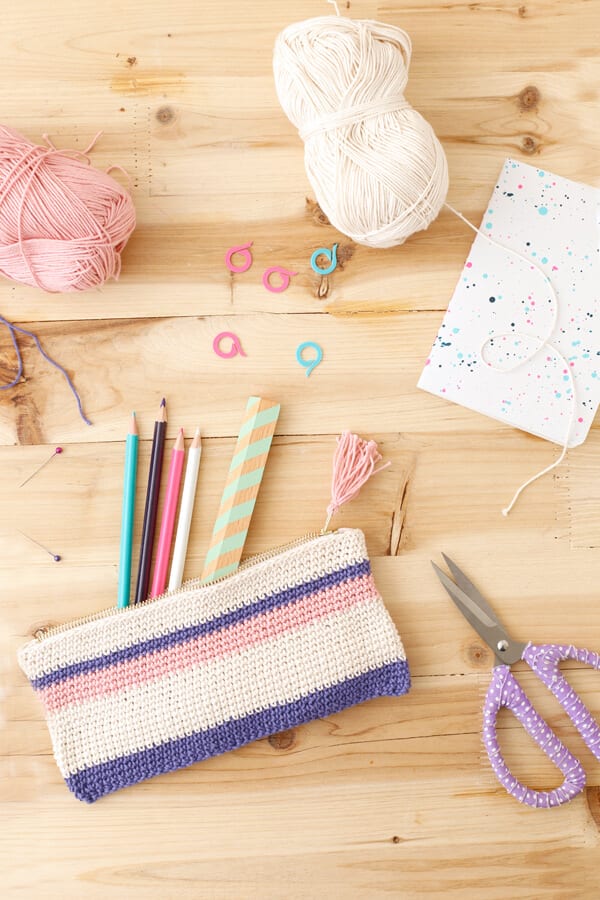
Estuche a crochet (para principiantes)
Estoy muy feliz porque al fin podemos mostrarles el proyecto que hicimos junto a Romi de Migrante. Para quienes no la conocen, Romi es diseñadora industrial, y estos últimos años se ha especializado en el tejido a crochet, elaborando piezas funcionales, modernas y llenas de estilo.
Así que están súper invitados, desde ya, a ver su trabajo en su web e Instagram.
El proyecto que realizamos es perfecto para quienes están iniciándose en esto del crochet (cof, cof, yo): un colorido estuche para la oficina o el colegio, y para el cual usamos sólo un punto. Fa-ci-li-to.
Materiales:
- Algodón de 4 hebras
- Crochet de 3 mm
- Cierre de 20 cms
- Tijera
- Regla
- Aguja de lana
- Hilo y aguja
• • •
Crochet pencil case (for beginners)
I’m very happy because at last we can show you the project that I’ve been working on with Romi from Migrante. For those of you that don’t know her, Romi is an industrial designer, and over the last few years she’s specialised in crochet, making functional modern and very stylish pieces.
So you are all cordially invited, starting right now, to see her work on her website and Instagram.
The project we did together is perfect for those who are starting off in crochet (cough, cough, me): a very colourful pencil case for the office or for school, and for which we’ll only be using one type of stitch. EA-SY.
Materials:
- Four-strand cotton thread
- 3 mm crochet needles
- Zipper measuring 20 cm
- Scissors
- Ruler
- Wool needle
- Needle and thread
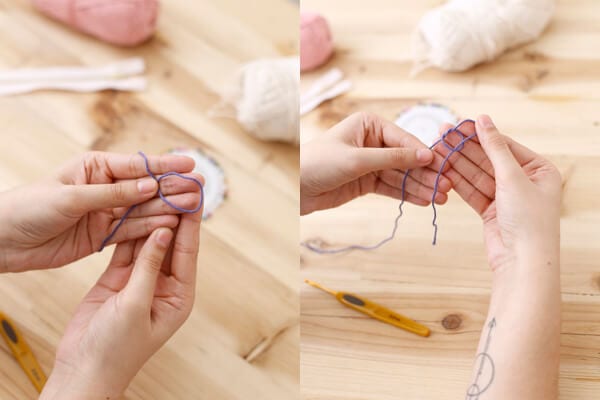
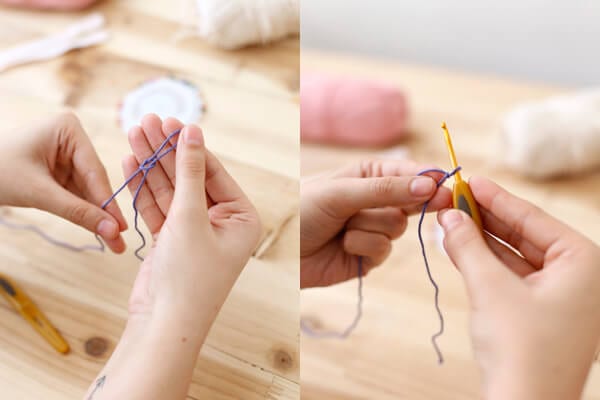
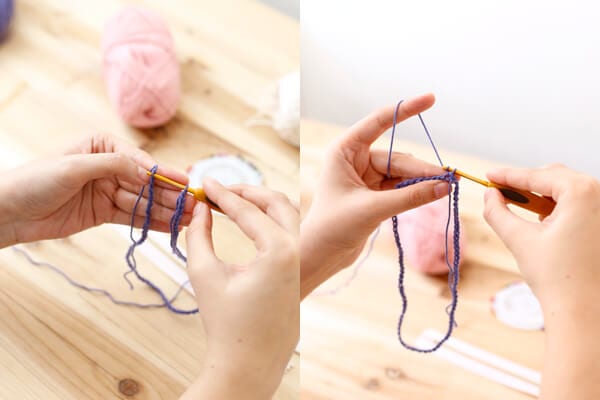
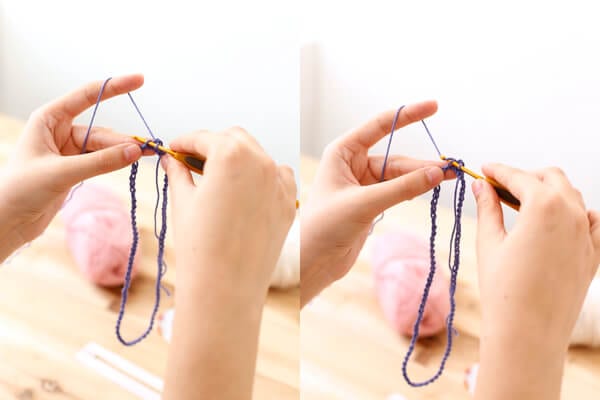
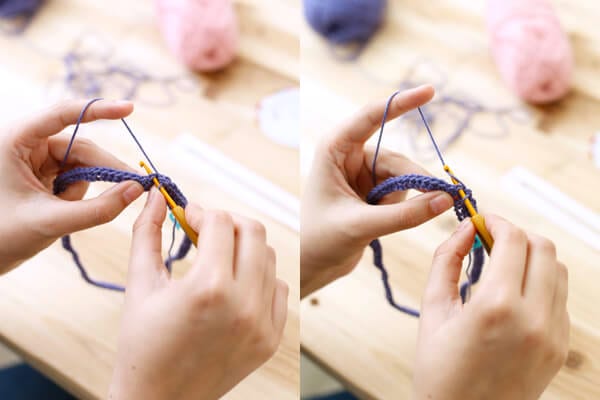
Paso 1
Comienza haciendo un nudo corredizo, luego haz 88 cadenetas y únelas con un punto deslizado. La cantidad de cadenetas dependerá del largo de tu cierre. Como el tejido será tubular, contempla el doble.
Ejemplo, para nuestro cierre de 20 cms, eran necesarias 44 cadenetas por lado, pero como necesitamos el doble, fueron 88 en total.
Procura que al cerrar tu tejido, las cadenetas no se giren.
• • •
Step 1
Start by making a slip knot, then do 88 chains and join them with a slip stitch. The number of chains you do will depend on the length of your zipper. As your fabric is going to be tubular, you will need to do double the length.
For example, for a zipper which measures 20 cm, it was necessary to make 44 chains on each side, as we need double, they were 88 chains in total.
You want it so that when you close your fabric, the chains don’t turn.
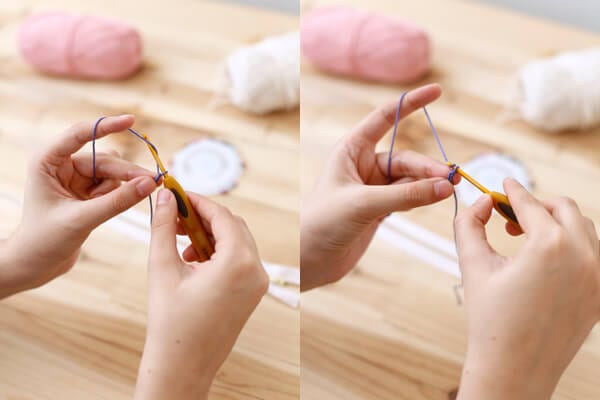
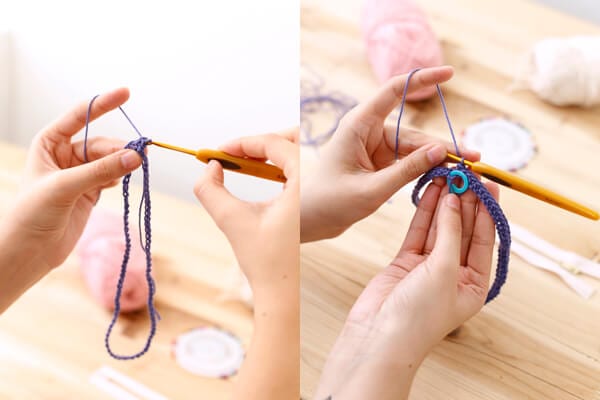
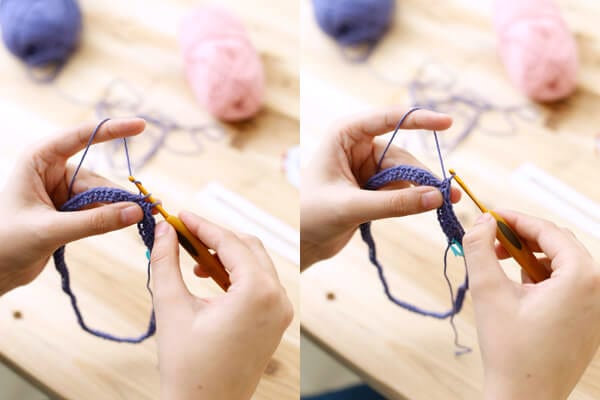
Paso 2
Comienza a tejer todas las cadenetas con un punto bajo usando el primer color (A), cuando llegues a la última cadeneta, señálala con un marcador de puntos o un pedacito de lana para que sepas que ese es el inicio.
• • •
Step 2
Begin knitting all the chains with a single crochet using the first colour (A), when you get to the last train, mark it with a stitch marker or a small piece of wool so that you know that this is the beginning.
Paso 3
Continúa tejiendo puntos bajos en espiral y realiza la cantidad de filas que desees, en este caso realizamos 5.
Cierra con un punto deslizado en la cadeneta más cercana al marcador de punto que pusiste al inicio.
• • •
Step 3
Continue knitting single crochet stitches in a spiral and do the number of lines that you want, in this case was it five.
Close with a slip stitch on the chain closest to the stitch marker that you placed at the beginning.
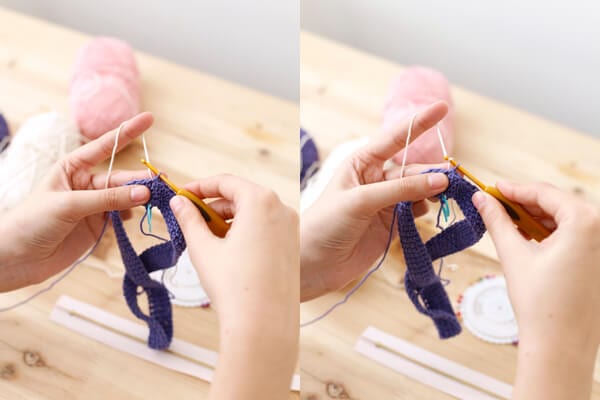
Paso 4
Para cambiar de color pon la nueva hebra (B), en este caso beige, por detrás del tejido y lázala dentro del punto de color (A), en este caso morado. Una vez dentro, tira A para ajustar el punto y afirmar B.
Repite el paso 3 y 4 hasta obtener la altura deseada. En nuestro caso, realizamos 25 filas.
• • •
Step 4
To change colour put the new thread (B), in this case beige, behind the fabric and pass it through the centre of (A) colour stitch, in this case purple. Once its through, pull A to adjust the stitch and fix B.
Repeat steps three and four until you obtain the desired height. In our case we did 25 lines.
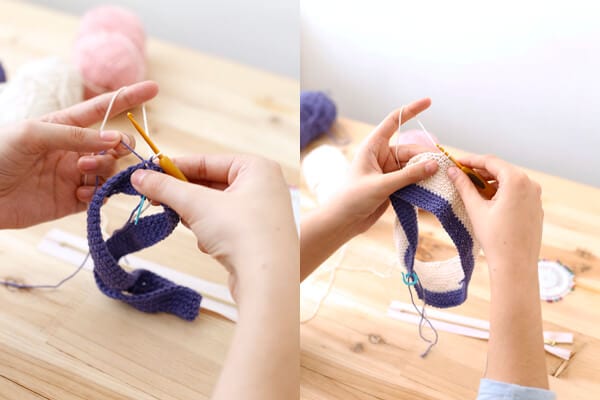
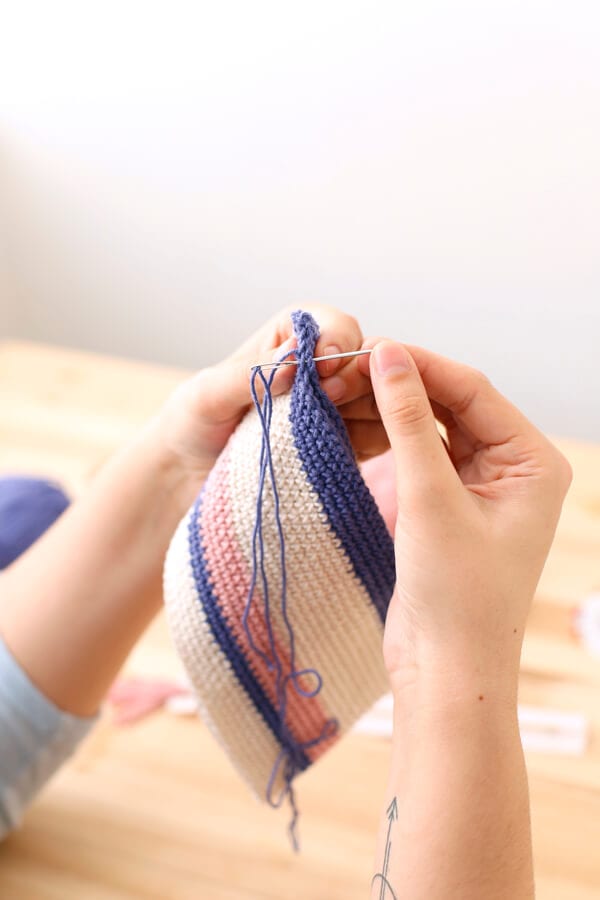
Paso 5
Una vez listo, cierra el punto y utiliza la aguja de lana para ocultar todas las hebras dentro del tejido. Corta el excedente.
• • •
Step 5
Once you are ready, close the stitch and using the wool needle hide all the threads within the fabric. Cut off all the extra bits.
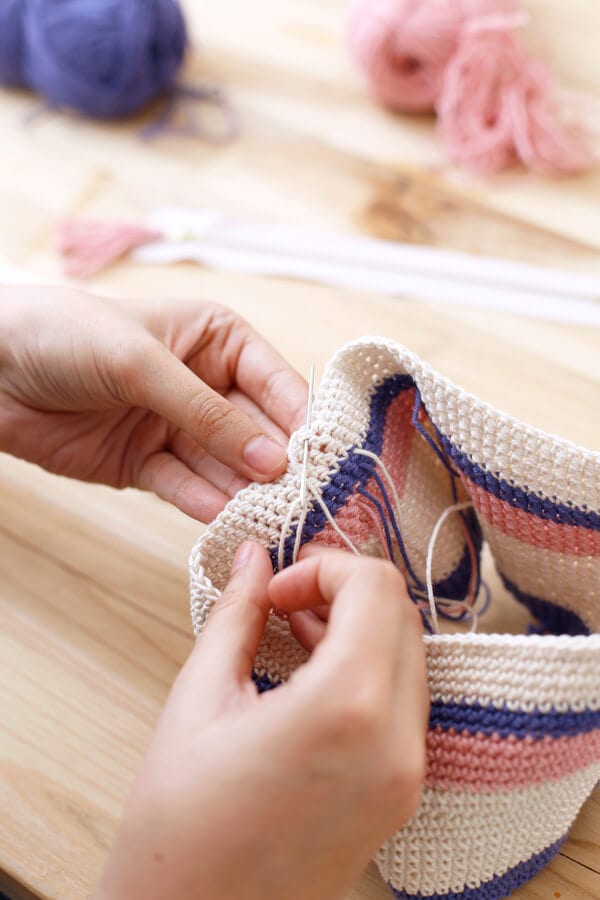
Paso 6
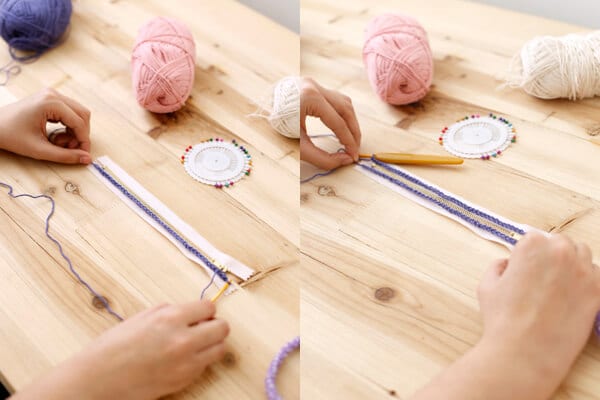
Cose la base -con la aguja de lana y algodón- para que tu estuche quede cerrado y firme.
• • •
Step 6
Sew the base with a needle and thread so that your pencil case is closed and sturdy.
Paso 7
Para poner el cierre, fíjalo con alfileres a tu estuche y cose bien con hilo y aguja del color del algodón que utilizaste.
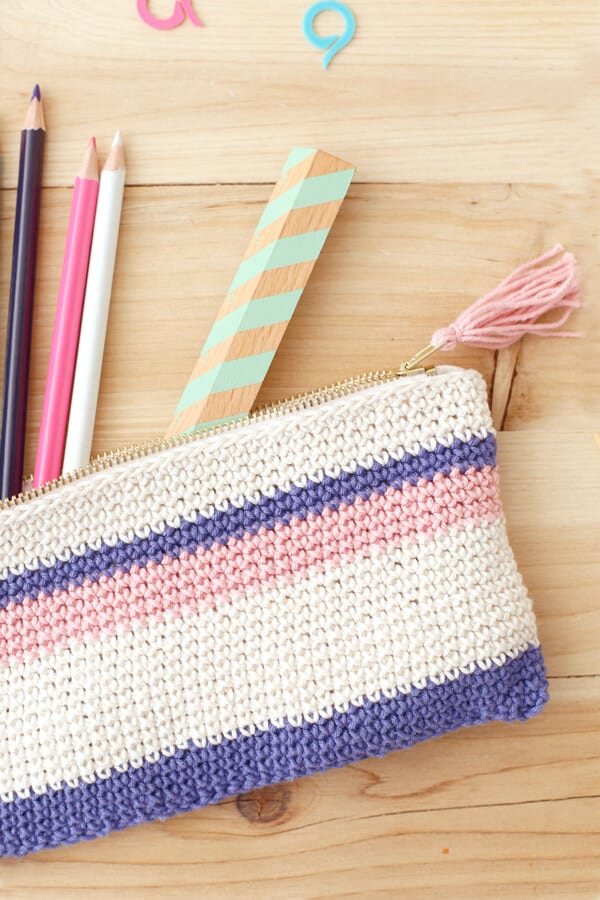
Si quieres, puedes hacer una borla o tassel para decorar el tirador.
• • •
Step 7
To attach the zipper, fix it with pins to your pencil case on sew well with a needle and thread matching the colour of the thread to the cotton you have used.
If you want, you can add a bead or a tassel to decorate the zipper pull.

¡Así de simple! Y lo que más me gustó del proyecto es que puedes fabricarlo en los colores que quieras y de las dimensiones que se te ocurra. Yo ya me estoy haciendo un estuche para el notebook.
• • •
It’s that simple! What I most liked about this project is that you can do it in whatever colours you want and whatever size you can think of. I’m already making a case for my laptop.

¡Esperamos que les haya gustado! Y mil gracias a la Romi por compartir parte de su lindo trabajo con nosotros.
Recuerden pasar por su blog y seguirla en Instagram.
Un abrazo! Cony
• • •
We hope that you liked it! And many thanks to Romi for sharing some of her lovely work with us.
Remember to have a look at her blog and follow her on Instagram
Hugs! Cony


