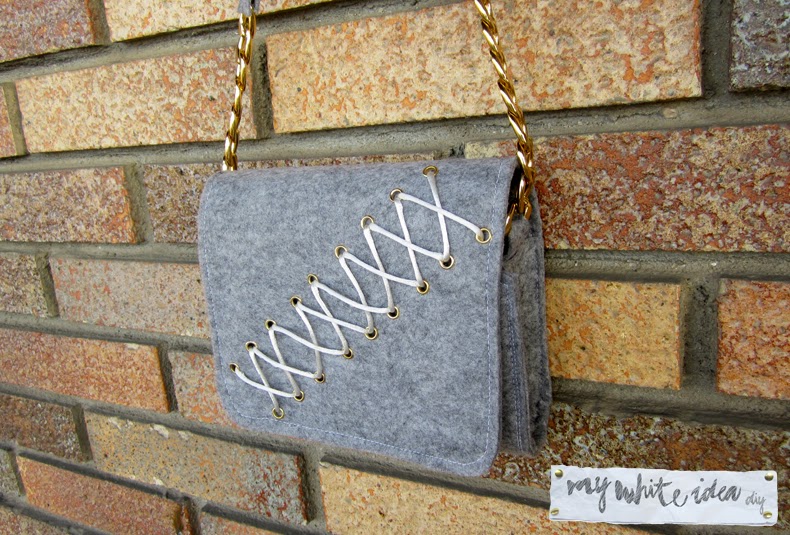
diy bolso de fieltro
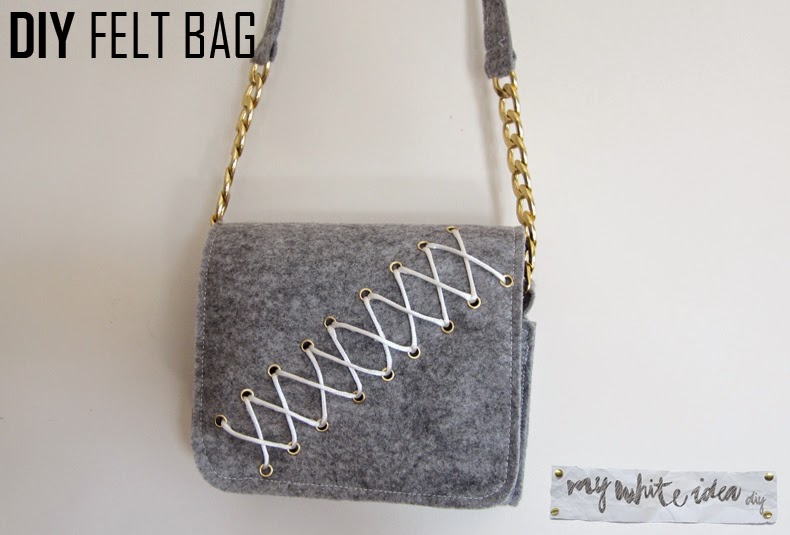
Siempre digo que lo mejor de los DIY es regalarlos, pues este bolso es un regalo, que ya tiene su dueña desde hace unos meses y que tenía pendiente de publicar, pero por una cosa o por otra, siempre lo posponía.
Este es un buen ejemplo que con poco dinero puedes hacer accesorios muy chulos, además este año el gris se va a llevar un montón.
I always say that the best of the DIY is make it for giving them away, because this bag was a gift for a friend, which already has it since a few months ago, and I had not published it (I don´t know why, because I love it)
This is a good example that you can do really cool accessories with little money, plus this year the gray is going to be very fashionable.
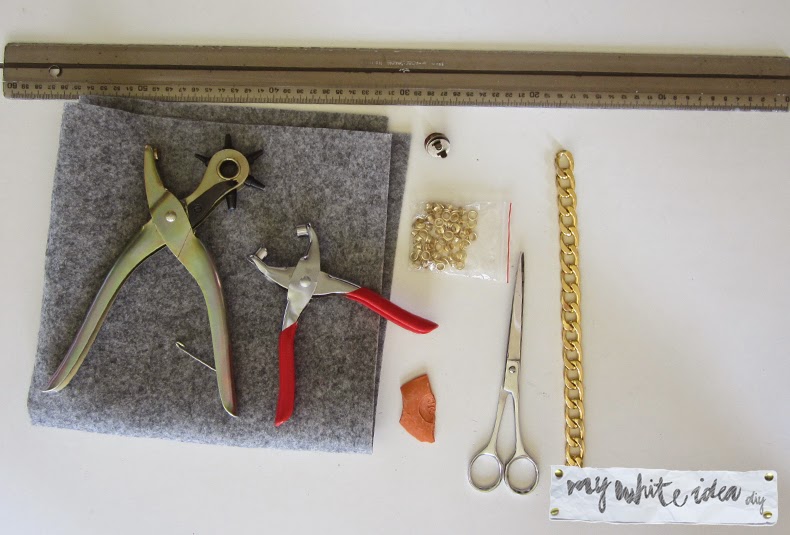
Materiales:
Fieltro grueso, regla, cierre de imán, tijeras, cadena, tiza, sacabocados, alicates ojeteros y cordel (no está en la foto)
Materials:
Materials:
Thick felt, ruler, magnet closure, scissors, string, chalk, eyelet pliers, perforating punches and rope (not in the photo)
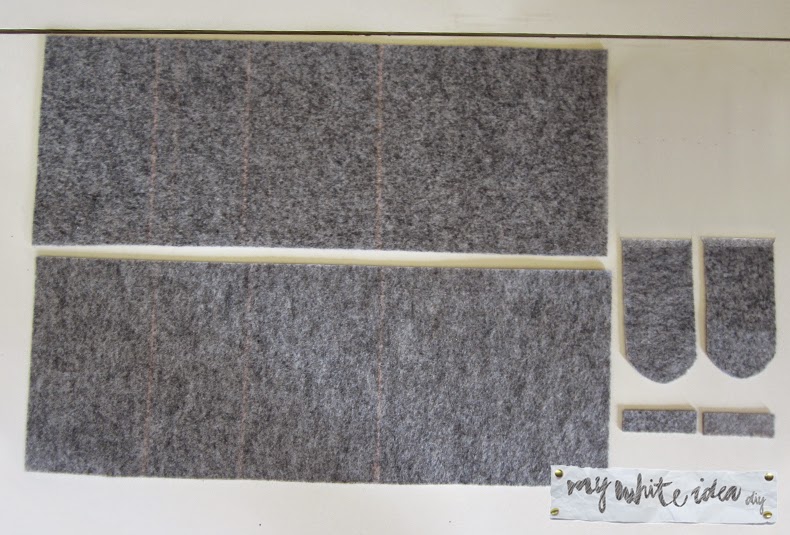
Cortamos el fieltro, las medidas son:
2 rectángulos: 48 cm X 20 cm
2 laterales: 12 cm X 6 cm (En uno de los lados hacer una semicircunferencia de 2 cm alto como se ve en la foto)
2 rectángulos pequeños: 6 cm X 2 cm
Cut the felt, the measures are:
2 rectangles: 48 cm X 20 cm
2 sides: 12 cm X 6 cm (make a semicircle of 2 cm high in one side as shown in the photo)
Cut the felt, the measures are:
2 rectangles: 48 cm X 20 cm
2 sides: 12 cm X 6 cm (make a semicircle of 2 cm high in one side as shown in the photo)
Two small rectangles 6 cm X 2 cm

Dibujamos una cuadrícula con la tiza para que los agujeros queden a la misma distancia
Draw a grid with the chalk
Draw a grid with the chalk

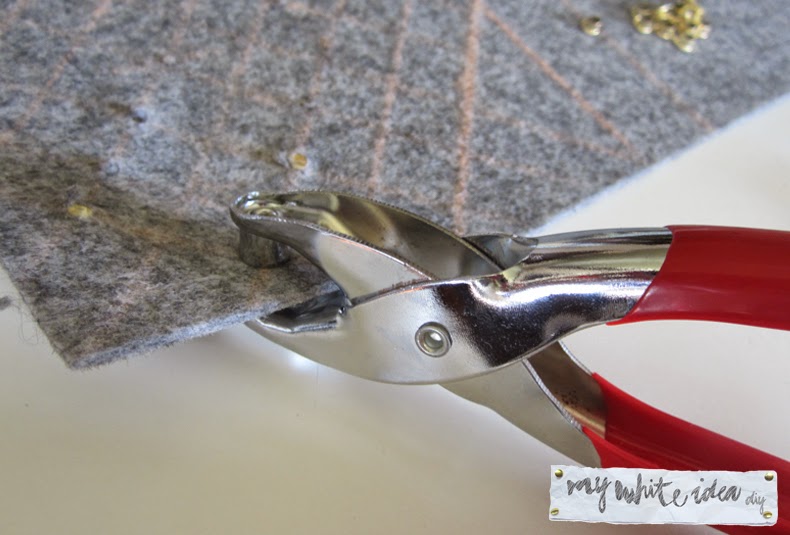
Hacemos los agujeros con el sacabocados
Make the holes with the perforating punches
Make the holes with the perforating punches
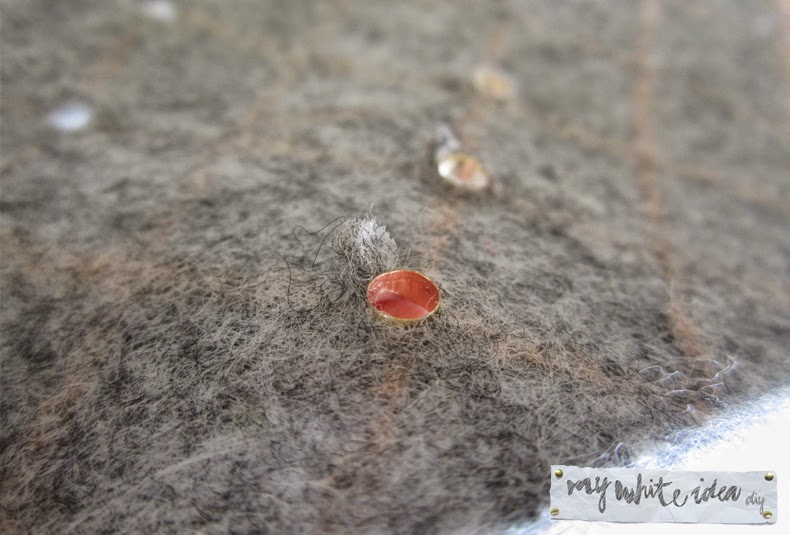
Colocamos el ojal metálico en los agujeros
Place the eyelet in the holes
Place the eyelet in the holes
Fijamos cada ojal con el alicate de ojales
Place each eyelet with the eyelet pliers
Place each eyelet with the eyelet pliers
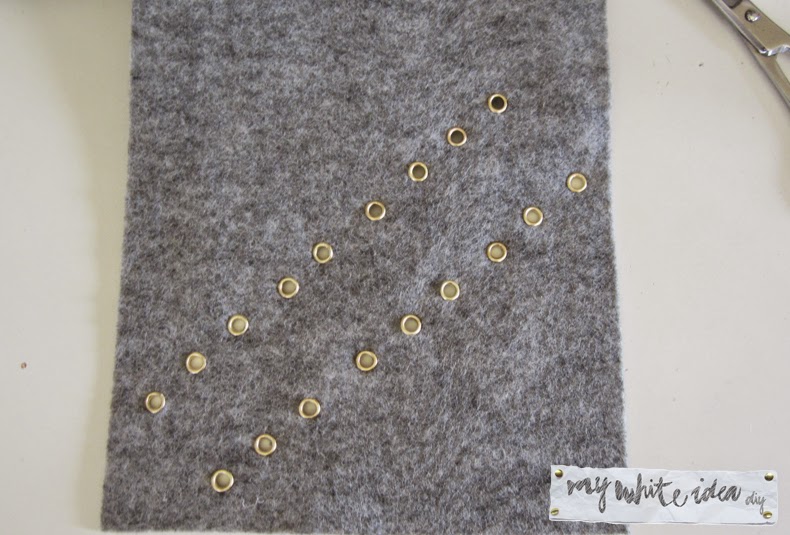
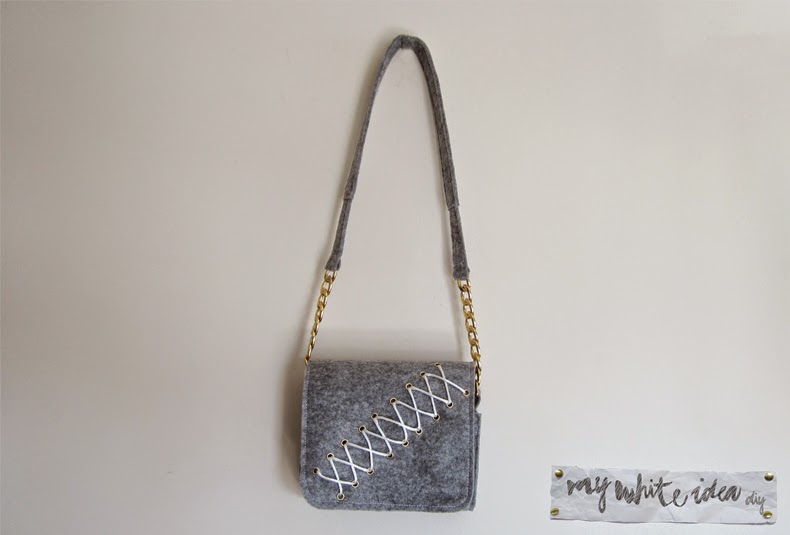
Yo hice este diseño pero se pueden hacer infinidad de diseños diferentes
You can make your favourite design!
You can make your favourite design!
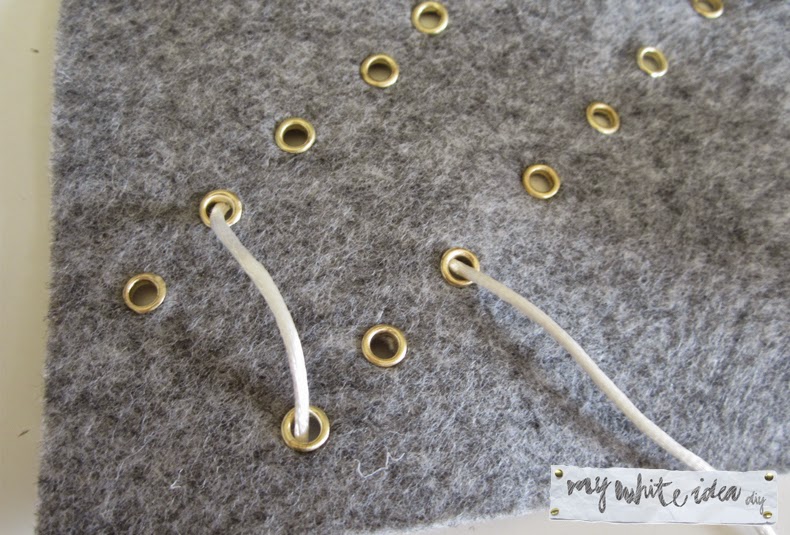
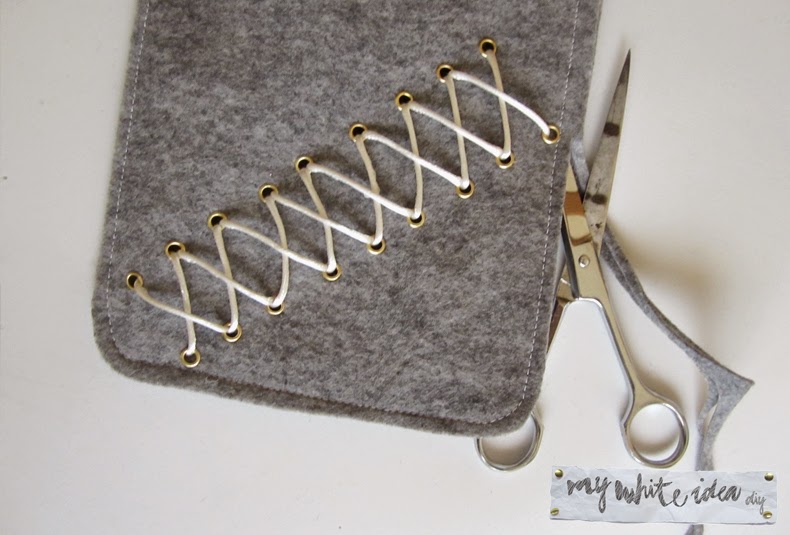
Introducimos el cordón simulando un Corsé
Introduce the rope in the holes like a Corset
Introduce the rope in the holes like a Corset

Antes de coser los dos rectángulos, colocamos los cierres de imán, para saber que los hemos colocado correctamente, comprobamos que se juntan las 2 partes que hacen imán
Before sewing the two rectangles, place the magnet closures. to know that we have placed correctly, check that the 2 parts match with the magnet part.
Before sewing the two rectangles, place the magnet closures. to know that we have placed correctly, check that the 2 parts match with the magnet part.
Cosemos los 2 rectángulos y cortamos el exceso, dando una forma redondeada en lo que va a ser la tapa del bolso
Sew the 2 rectangles and cut the excess, make a rounded shape in what will be the top of the bag
Sew the 2 rectangles and cut the excess, make a rounded shape in what will be the top of the bag

Cosemos los rectángulos pequeños a las tapas laterales tal y como se ve en la foto, es importante que esté muy bien cosido ya que ahí irán el asa del bolso
Sew the small rectangles to the sides as seen in the picture, make a double stitched!
Sew the small rectangles to the sides as seen in the picture, make a double stitched!
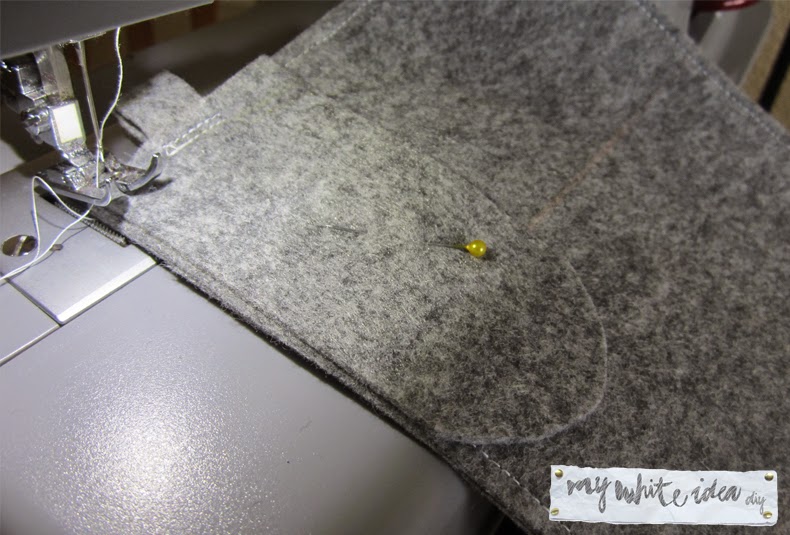
Cosemos los laterales al bolso, coser la zona de la circunferencia es lo más complicado, así que si os cuesta, es mejor que giréis la máquina de coser a mano con la rueda o que esa parte la cosáis a mano.
Sew the sides to the bag. Sew the part of the semicircle is the most complicated, so if it is very complicated to you, is better sew it by hand.
Sew the sides to the bag. Sew the part of the semicircle is the most complicated, so if it is very complicated to you, is better sew it by hand.

Así es como queda el lateral cosido
Here is how the side is sewn
Here is how the side is sewn

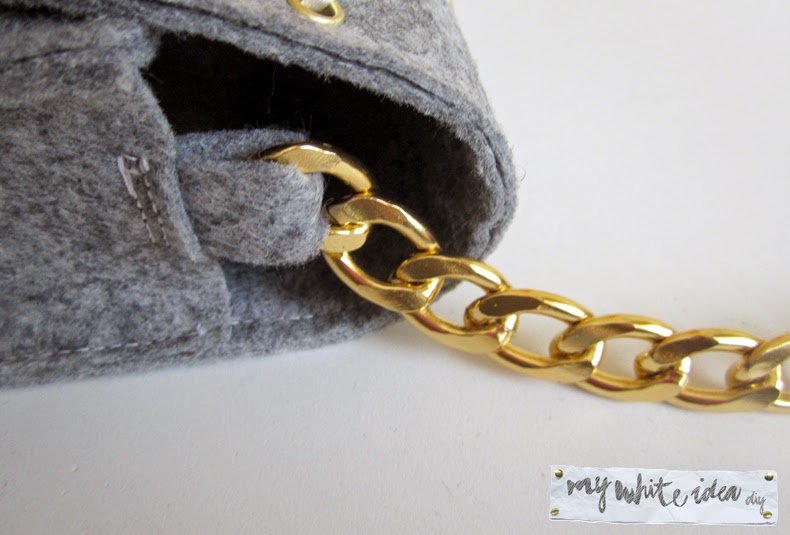
Colocamos la cadena en los laterales
Place the chain in the laterals
Place the chain in the laterals
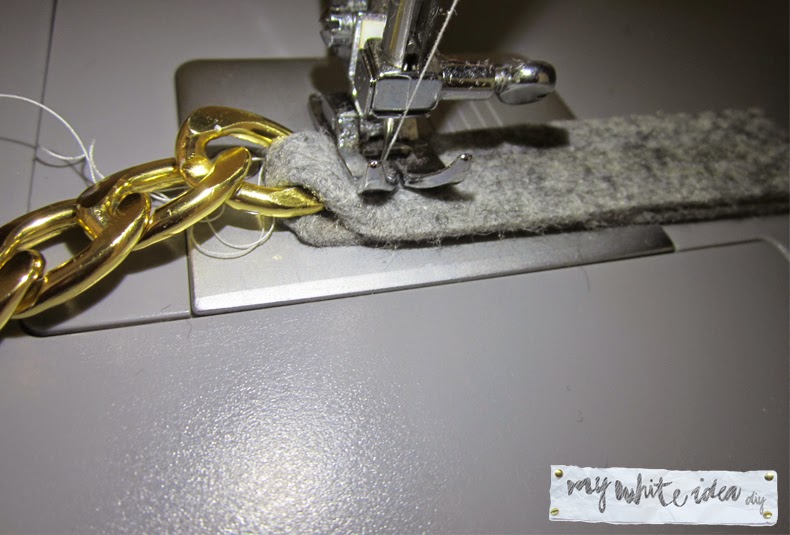
Como no tenía cadena suficiente para todo el asa del bolso, el resto lo hice con una tira de fieltro cosida de forma doble, también podéis aprovechar una asa de algún bolso que ya no utilicéis
I had not enough chain for the whole handle of the bag, I did the rest with a double strip of felt, you can also reuse a handle from other bag.
I had not enough chain for the whole handle of the bag, I did the rest with a double strip of felt, you can also reuse a handle from other bag.
Espero que os guste y gracias por los comentarios!
I hope you like it and thanks for the comments!