Decora tu chaleco con pompones de colores
Hola a todos! El post de hoy es para alegrar los días nublados y fríos que hemos tenido en Santiago estas últimas semanas.
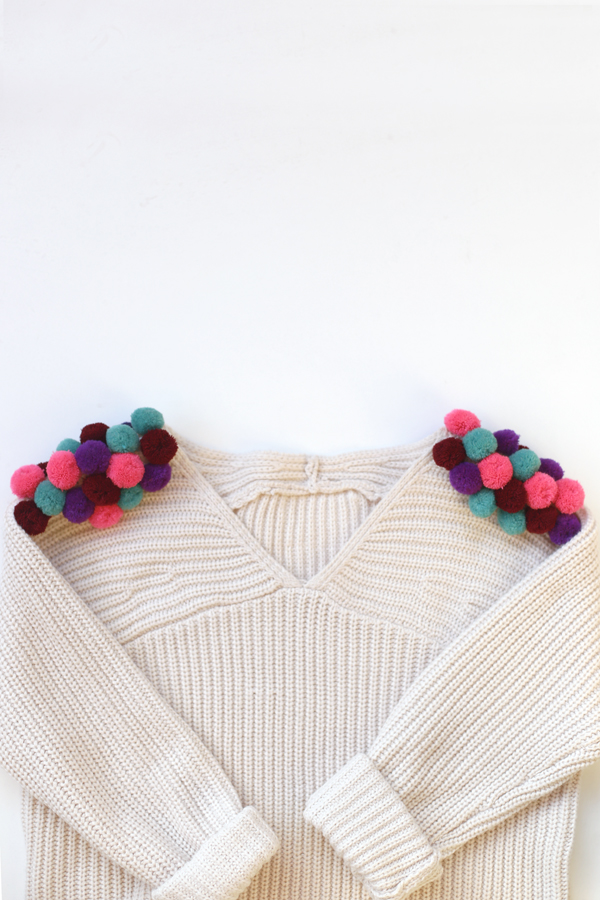
El invierno tiene una capacidad asombrosa de colarse por todos lados, ¡incluida la ropa! Por eso, y para terminar con la idea de las prendas oscuras en esta época, quise hacer esta aplicación con pompones en un chaleco que tenía, que si bien es color beige, era bastante plano y aburrido.
¿El resultado? Unas hombreras llenas de color y textura, capaces de darle vida a cualquier tenida invernal.
Materiales:
- Chaleco
- Pompones de colores: puedes hacerlos o comprarlos. En mi caso opté por la segunda opción. Los encontré en calle Rosas, casi llegando a Bandera.
- Hilo y aguja
- Tijeras
• • •
Decorate your jumper with coloured pom poms.
Hi everyone! Today’s post is to cheer up the cloudy and cold days that we’ve had in Santiago these last couple of weeks.
Winter has a habit of getting everywhere, even into our clothes! Because of that and to finish off the concept of using dark garments during this season, I wanted to do this pom pom modification on a jumper that I had, and even though it’s beige, it was pretty plain and boring.
The result? Shoulders full of colour and texture, capable of bringing back to life any winter outfit.
Materials:
- Jumper
- Coloured pom poms: You can make them or buy them. In my case I opted for the latter option. I found them in Rosas street, nearly at the intersection with Banderas Street.
- String and a needle
- Scissors
Comienza probándote el chaleco y viendo cuál es el mejor lugar para poner los accesorios. Quizás, si tu espalda es más ancha, y no quieres destacar tanto tus hombros, puedes optar por las mangas, los puños o cuello.
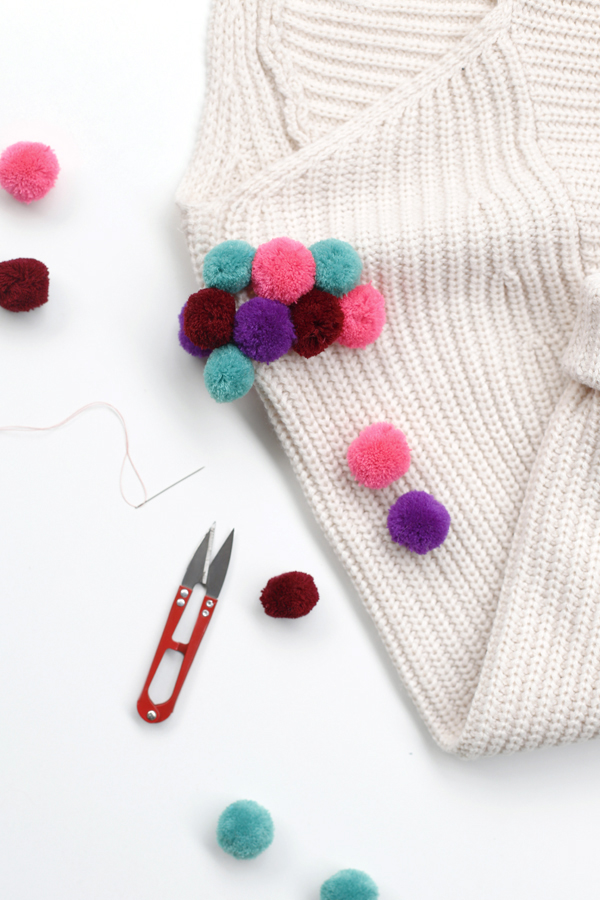
Una vez que hayas definido dónde irán los pompones, haz una “vista previa” con la ubicación y colores exactos, para que después no tengas que descoser en caso que no te guste.
Comienza a coserlos uno a uno. Asegúrate que queden bien firmes dando varias puntadas y cerrando bien con un nudo.
Tip: No cosas los pompones de una sola vez, usando una sola hebra, porque así, si quieres cambiar alguno de lugar no tendrás que descoserlos todos.
• • •
Start by trying the jumper on and deciding where is the best place to put the accessories. Maybe your back is wider and you don’t want to highlight your shoulders, so you can go for the sleeves, cuff or neck.
Once you’ve decided where to put the pom poms, make a “preview” with the location and exact colours so then you don’t have to unstitch it in case you don’t like it.
Start stitching them one by one. Make sure that they are secure by doing several stitches and closing with a knot.
Tip: Do not stitch the pom poms all in one go, using just one strand of thread, that way if you want to change the location of one you won’t have to unstitch them all.
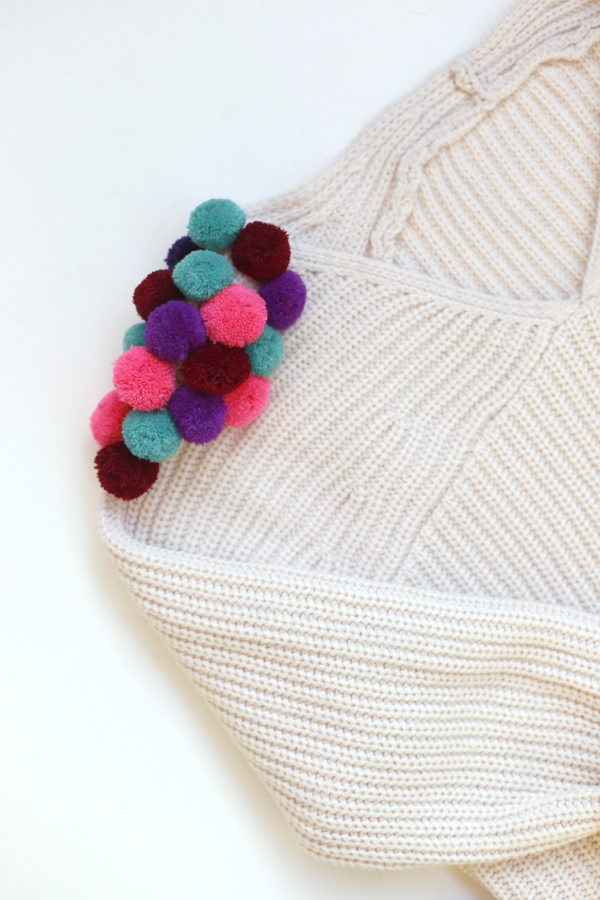


¿Te gustó el resultado? Te invito a intervenir tu ropa, agregarle colores, formas y texturas. Lo vas a pasar bien haciéndolo y de seguro lo pasarás mejor luciéndolas.
Un abrazo!!
Cony
• • •
Did you like the result? I invite you to modify your clothes, to add some colour, texture and shapes to them. You will enjoy the process and you will definitely enjoy showing them off even more.
Hugs!! Cony


