Cama para gato (parte 1) – A bed for a cat (part 1)
Primera entrada del año! Más vale tarde que nunca jejeje. Hace unas cuantas semanas que me ronda una idea por la cabeza y por fin le estoy dando forma. Estaba cansada de ver a mi gato Tití, acurrucado en una manta delante de la estufa, que aunque es su favorita, con el frío que hace a veces me da la sensación que le traspasa el frío. Su antigua camita es pequeña para su tamaño, así que ya pasa de ella.
This is my first post of the year! I started this month thinking about making a new bed for my cat Tití, because his old one is a bit little.
This is my first post of the year! I started this month thinking about making a new bed for my cat Tití, because his old one is a bit little.
Una tarde de camino al gimnasio (una servidora va a darle un poco de caña al body) me llamó la atención una caja de frutas vacía en una esquina, entré a la tienda y le pregunté al dueño si me la podía llevar si es que tenia pensado tirarla. El señor, muy amablemente, me dijo que era mía 😀 :D! Cuando llegué a casa, estaba tan contenta que le dije a Tití que pronto le daría una sorpresa.
One evening, while I was going to the gym I saw a crate on a corner, so I entered to the store and asked the owner if I could take it. The shopper told me very kindly that of course I can. When I arrived at home, I told Titi that soon I»ll give him a surprise.
Al día siguiente, fui a comprar un bote de pintura y una tela a conjunto y me puse manos a la obra. Por eso, en la entrada de hoy, os quiero explicar cómo empecé a transformar la caja en algo más que una simple cosa de madera vacía…
The next day, I went to buy a sprayer paint and some fabric. So in today»s post, I want to explain how I began to transform the crate into something beautiful.
The next day, I went to buy a sprayer paint and some fabric. So in today»s post, I want to explain how I began to transform the crate into something beautiful.
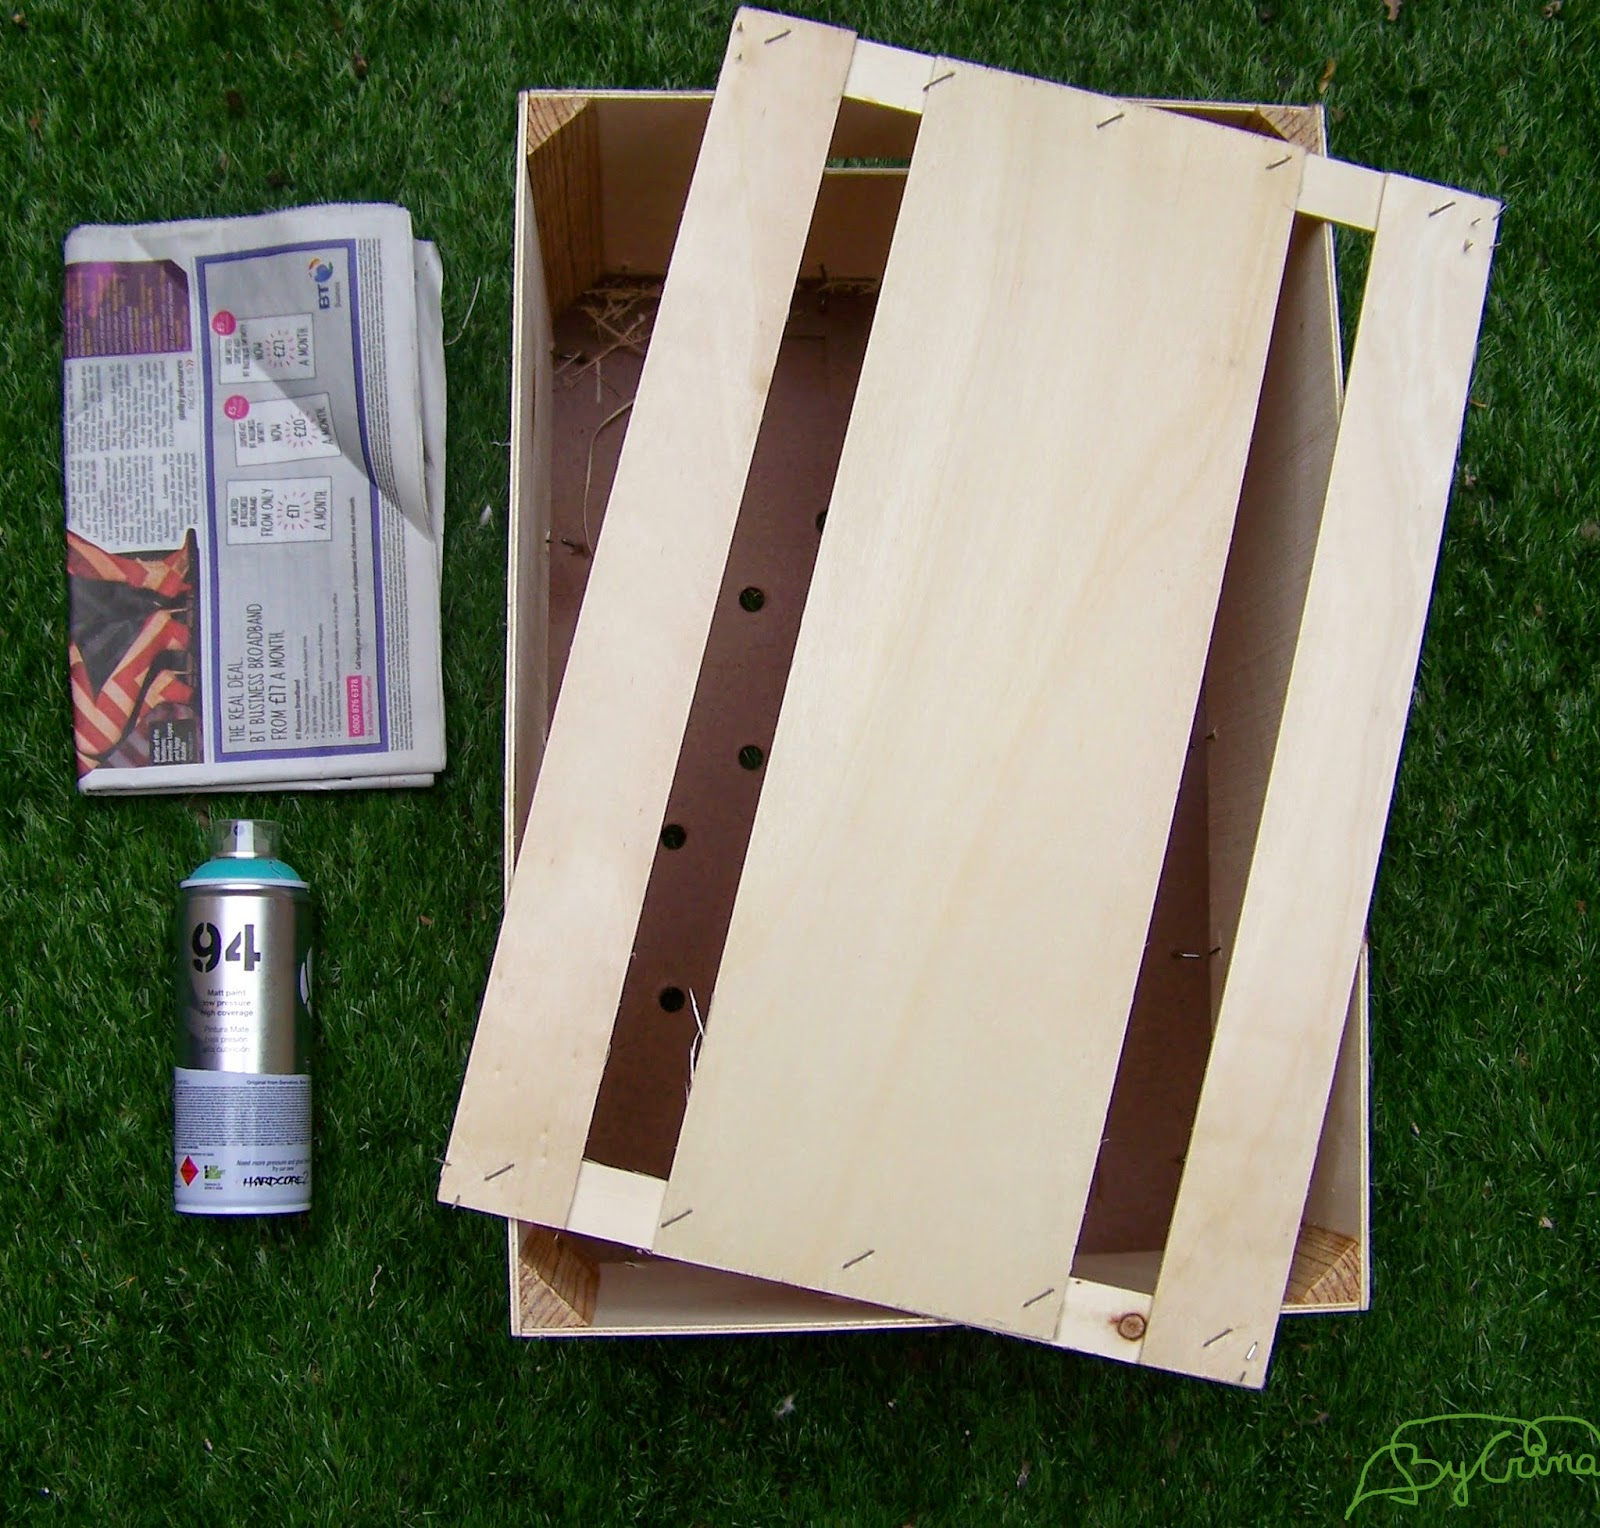
Para empezar necesitamos: una caja, si es de madera mucho mejor, pero pueden ser de cartón duro, un bote de pintura del color que más os guste, yo escogí un azul turquesa mate y un periódico que usaremos para colocar debajo de la caja para no ensuciar demasiado.
To start we need: a crate, a sprayer paint and a newspaper to place it under the box to keep everything clean.
Extendemos el papel de diario para no manchar, en mi caso no quería tener ningún disgusto con el césped de mi terraza. Os recomiendo usar unos guantes y una mascarilla para cubriros la nariz y la boca (tipo cirujano), evitareis respirar toda la pintura que sale volando por los aires.
Cover the ground with some papers and start painting. I recommend you to use some gloves and a mask to cover your nose and mouth, that will help you to avoid any paint that goes flying through the air.
Cuando acabé de extender la primera capa, dejé secar la pintura durante un par de horas.
When I finished the first layer, I let it to dry for a couple of hours.
Antes de darle la segunda capa de pintura, la caja me resultaba un poco alta para que Tití pudiera entrar, así que se me ocurrió la genial idea de facilitarle la entrada a su nueva camita cortando un poco una de las partes frontales. Tomé las medidas e hice una marca con lápiz, a continuación, con una sierra especial para madera fui cortando siguiendo la linea que había dibujado. Una vez serrado todo, tuve que lijar/limar las partes cortadas para que no quedaran trocitos de madera que se pudieran clavar en las manos o patitas de Tití.
Before painting for the second time, I thought that the crate was a little high for Tití and that could be a problem. So i decided to curt some centimeters of one of the frontal sides. After sawing remember to sand the place that you cut, to avoid the little pieces of wood.
Una vez acabé de limar/lijar el corte que hice, volví a pasar una segunda capa de pintura a la caja, ahora estoy esperando que se seque para poder elaborar la segunda parte del tutorial 😀
Once I finished sanding I started to paint again. Now I»m waiting to elaborate the second part of the tutorial.
La verdad es que nunca había hecho algo así, jamás había pintado nada con spray (tuve mi momento de grafitera jaja), aunque he de reconocer que usar esa forma de pintura tiene sus ventajas y desventajas. Hay que ir con cuidado e intentar no respirar todo lo que suelta el frasco (por eso os decía lo de la mascara) y tienes que tener cuidado con las superficies en las cuales pintas, porque no controlas como cuando usas una brocha. A su favor he de decir que ahorras muuuuuuuuuchooooo tiempo, ya que en dar una capa tardas 10 minutos.
On fact, it»s the first time that I use this kind of sprayer paint. but I admit that using this form of painting has its advantages and disadvantages. It takes you 10 minutes to paint something, so that means that it»s too fast and you»ll save time, but you must be careful and try not to breathe all the paint the the bottle loose. I hope that you enjoyed this DIY.


