TUTORIAL GANXET: COIXÍ AGULLER
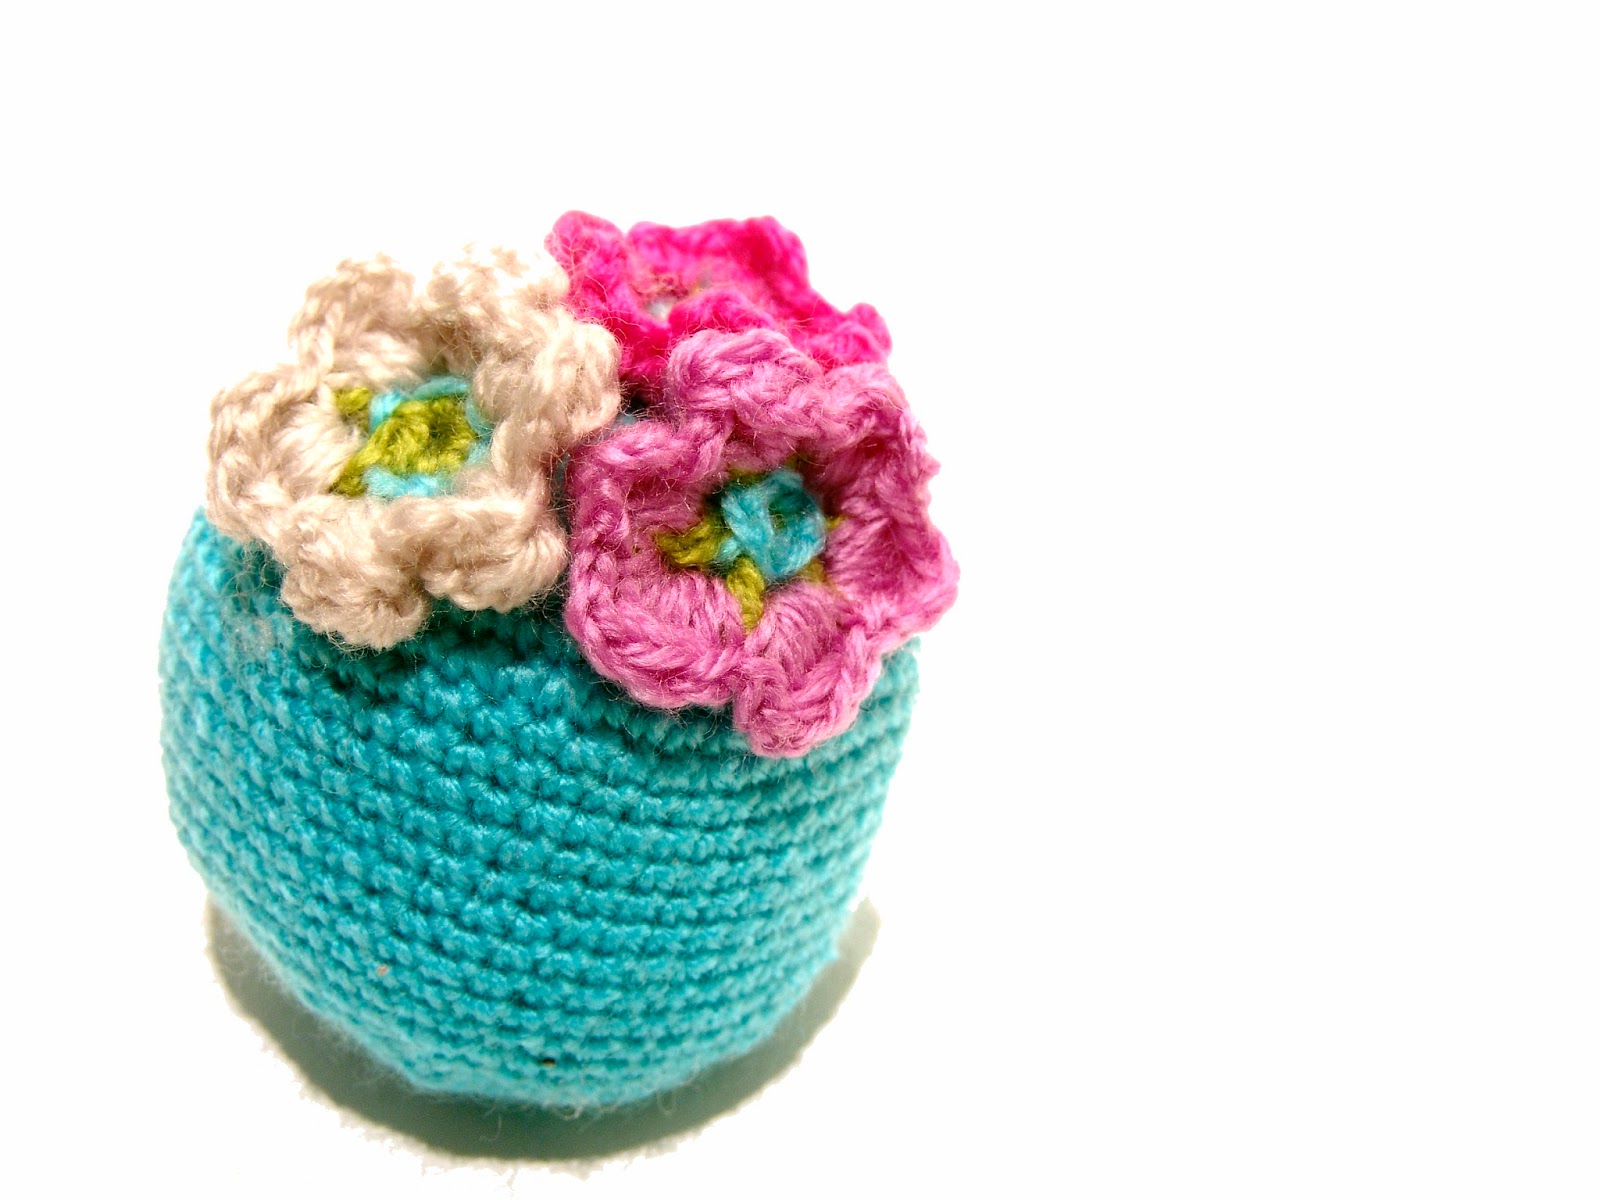
Quan vàrem aprendre a fer amigurumis, a mesura que avançàvem fent una bola per un cap, se’ns va acudir que seria bona idea fer un coixí aguller de ganxet.Es pot fer en qualsevol color i es pot guarnir amb flors (la nostra opció), botons, llaços, o allò que us passi pel cap.

Si ja heu fet amigurumis, serà molt senzill per a vosaltres, si no n’heu fet mai, aquí us deixem les següents indicacions:
- 6 pb (punts baixos) en un anell màgic (6)
- 1 au (augment) a cada punt (12)
- 1 pb, 1 au, repetir fins al final (18)
- 2 pb, 1 au, repetir fins al final (24)
- 3 pb, 1 au, repetir fins al final (30)
- 4 pb, 1 au, repetir fins al final (36)
- 5 pb, 1 au, repetir fins al final (42)
- 6 pb, 1 au, repetir fins al final (48)
- 7 pb, 1 au, repetir fins al final (54)
- Voltes 10 a 21: 1 pb a cada punt (54)
- 7 pb, 1 dism (disminució), repetir fins al final (48)
- 6 pb, 1 dism, repetir fins al final (42)
- 1 pb en cada punto (42) 5 pb, 1 dism, repetir fins al final (36)
- 4 pb, 1 dism, repetir fins al final (30)
- 3 pb, 1 dism, repetir fins al final (24)
- 2 pb, 1 dism., repetir fins al final (18). Farcim i tanquem.
Per les flors podeu fer servir el tutorial que ja vàrem publicar en un post anterior.
Per acabar només us cal cosir l’aplicació que hàgiu escollit i ja podeu començar a punxar agulles.
UN AGULLER MOLT FLONJO I ALEGRE!!!
TUTORIAL GANCHILLO: ALFILETERO.
Cuando aprendimos a hacer amigurumis, a medida que avanzábamos haciendo una bola para una cabeza, se nos ocurrió que sería buena idea hacer un alfileterode ganchillo. Se puede hacer en cualquier color y se puede adornar con flores (nuestra opción), botones, lazos, o aquello que os pase por la cabeza.

Si ya habéis hecho amigurumis, será muy sencillo para vosotr@s, si no habéis hecho nunca, aquí os dejamos las siguientes indicaciones:
- 6 pb (puntos bajos) en un anillo mágico (6)
- 1 au (aumento) en cada punto (12)
- 1 pb, 1 au, repetir hasta el final (18)
- 2 pb, 1 au, repetir hasta el final (24)
- 3 pb, 1 au, repetir hasta el final (30)
- 4 pb, 1 au, repetir hasta el final (36)
- 5 pb, 1 au, repetir hasta el final (42)
- 6 pb, 1 au, repetir hasta el final (48)
- 7 pb, 1 au, repetir hasta el final (54)
- Vueltas 10 a 21.- 1 pb en cada punto (54)
- 7 pb, 1 dism (disminución), repetir hasta el final (48)
- 6 pb, 1 dism, repetir hasta el final (42)
- 1 pb en cada punto (42)
- 5 pb, 1 dism, repetir hasta el final (36)
- 4 pb, 1 dism, repetir hasta el final (30)
- 3 pb, 1 dism, repetir hasta el final (24)
- 2 pb, 1 dism., repetir hasta el final (18). Rellenamos y cerramos.
Para las flores podéis usar el tutorial que ya publicamos en un post anterior.
Para acabar sólo tenéis que coser la aplicación que hayáis escogido y ya podéis empezar a pinchar agujas.
¡¡¡UN ALFILETERO MUY BLANDO Y ALEGRE!!!
CROCHET TUTORIAL: PINCUSHION.
When we learn how to make amigurumis, as we drove along making a ball for a head, we came up with that would be a good idea to make a crochet pincushion.Can be done in any colour and you can decorate with flowers (our choice), buttons, ribbons, or that which you want.
If you’ve already done amigurumis, it will be very easy for you; if you haven’t made, here we leave the following indications:
- 6 pb (single treble crochet point) for a magic ring (6)
- 1 au (increase) in each point (12)
- 1 pb, 1 au, repeat until the end (18)
- 2 pb, 1 au, repeat until the end (24)
- 3 pb, 1 au, repeat until the end (30)
- 4 pb, 1 au, repeat until the end (36)
- 5 pb, 1 au, repeat until the end (42)
- 6 pb, 1 au, repeat until the end (48)
- 7 pb, 1 au, repeat until the end (54)
- Rounds 10 to 21. 1 pb in each point (54)
- 7 pb, 1 dism (decrease), repeat until the end (48)
- 6 pb, 1 dism, repeat until the end (42)
- 1 pb in each point (42)
- 5 pb, 1 dism, repeat until the end (36)
- 4 pb, 1 dism, repeat until the end (30)
- 3 pb, 1 dism, repeat until the end (24)
- 2 pb, 1 dism., repeat until the end (18). We filled up and close.
For the flowers you can use the tutorial that we publish in a previous post.
To finish just you need to sew the application you have chosen and you can now start piercing needles.
A PINCUSHION VERY SOFT AND CHEERFUL!!!


